Page 6 of 17 FirstFirst ... 4567816 ... LastLast
Results 101 to 120 of 335

Thread: Custom Bag

  1. #101
    Senior Member
    Join Date
    May 2013
    Location
    UK
    Posts
    1,233
    Thanks
    793
    Thanked 2,008 Times in 819 Posts
    Rep Power
    12

    Default Re: Custom Bag

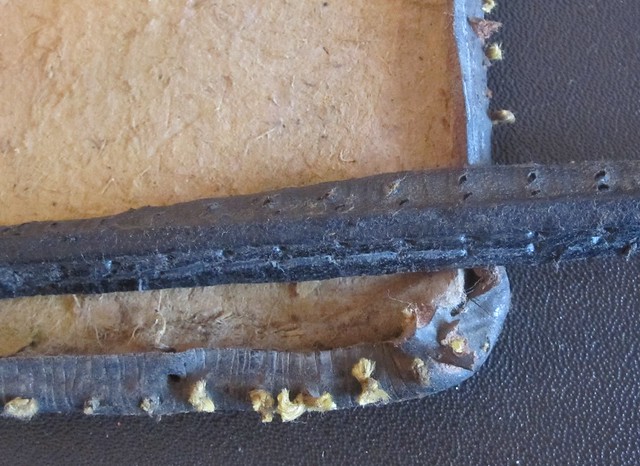
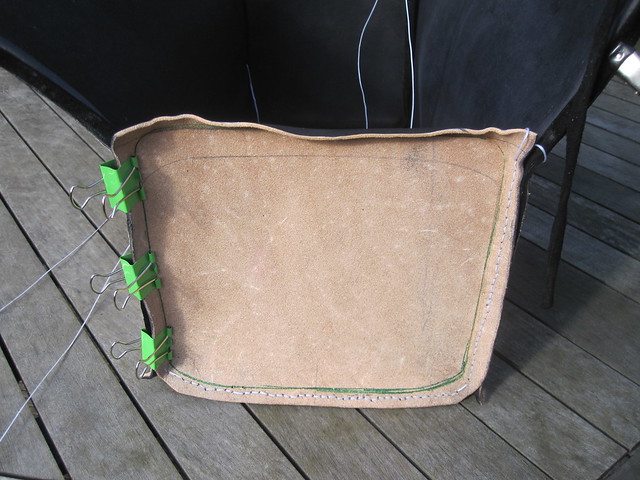
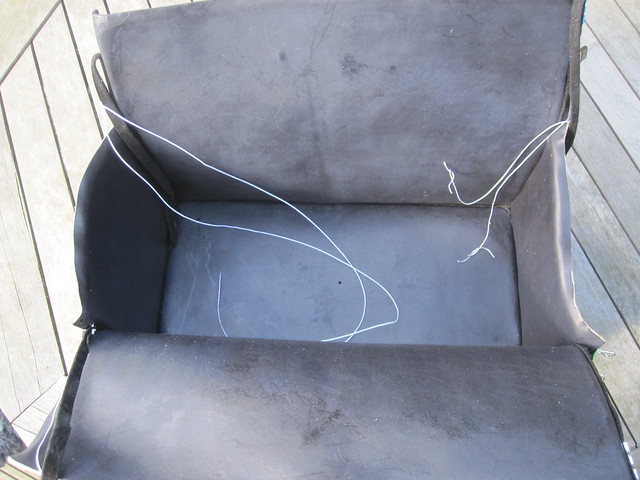
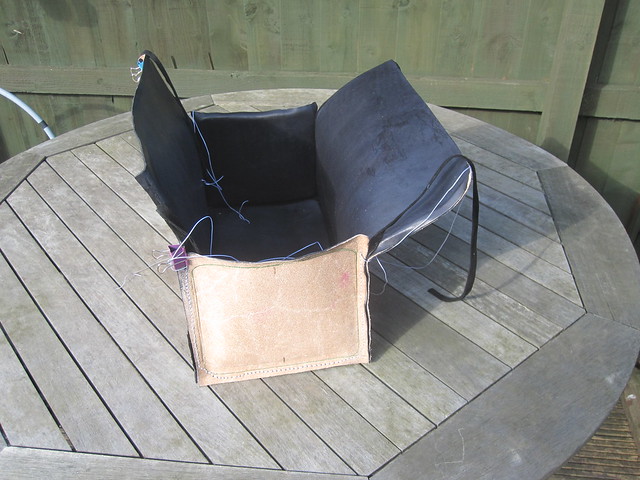
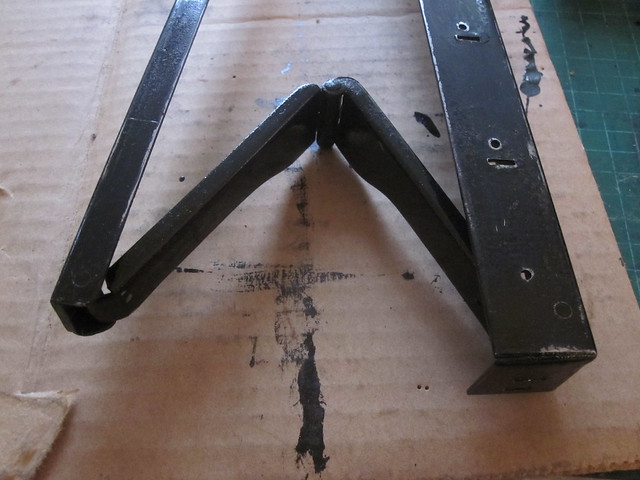
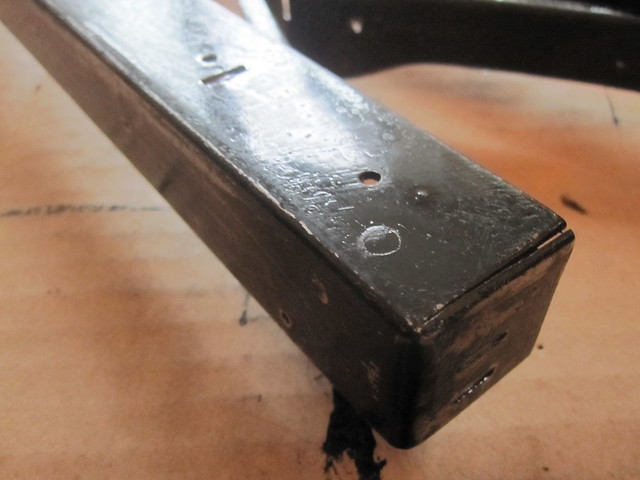
    I soaked the mounting points in cold water for about 10 minutes then used a modified clamp to form them around the edge of the case

    IMG_9558 by my0771, on Flickr

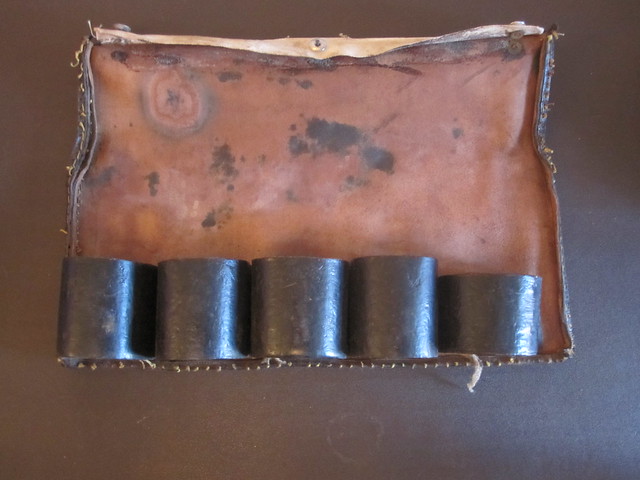
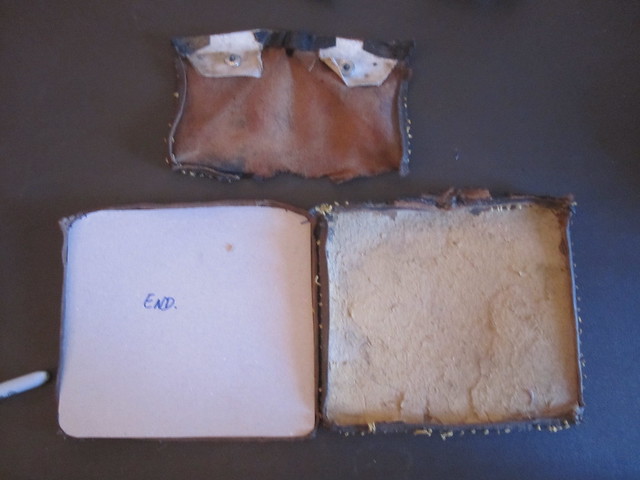
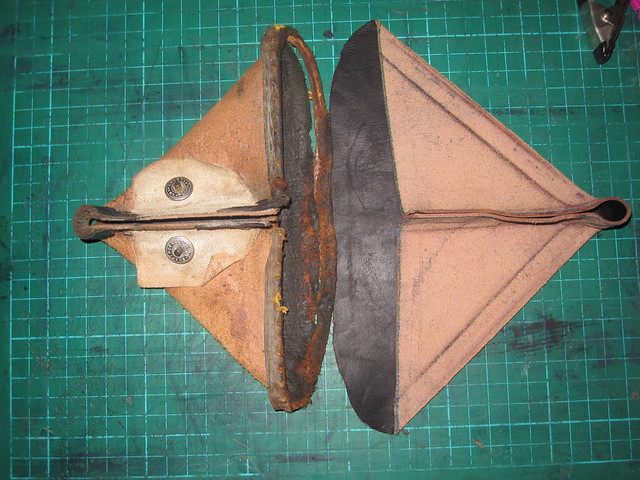
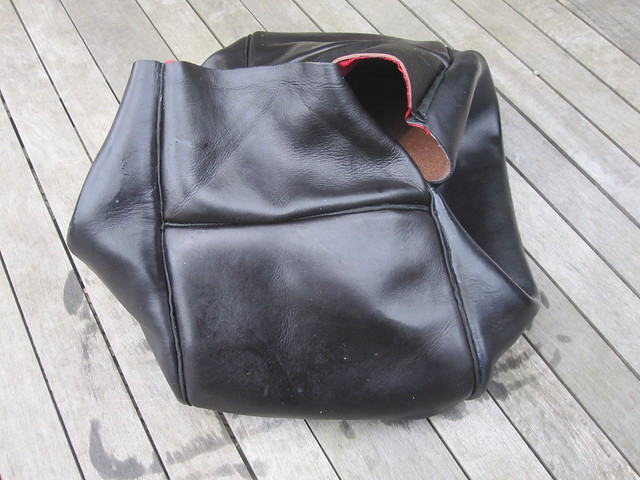
    After forming the correct shape I have applied some dye to the leather and allowed it to dry for a couple of hours.
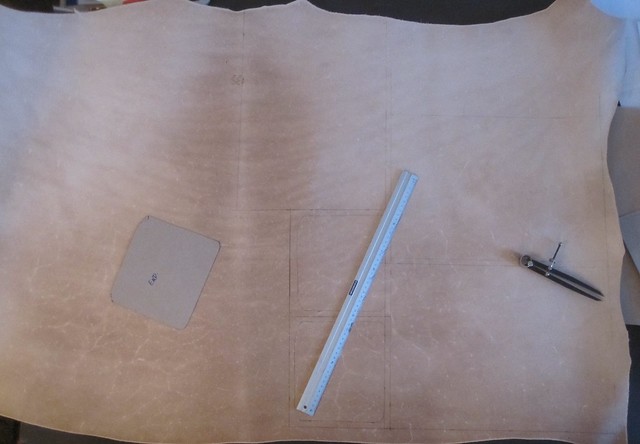
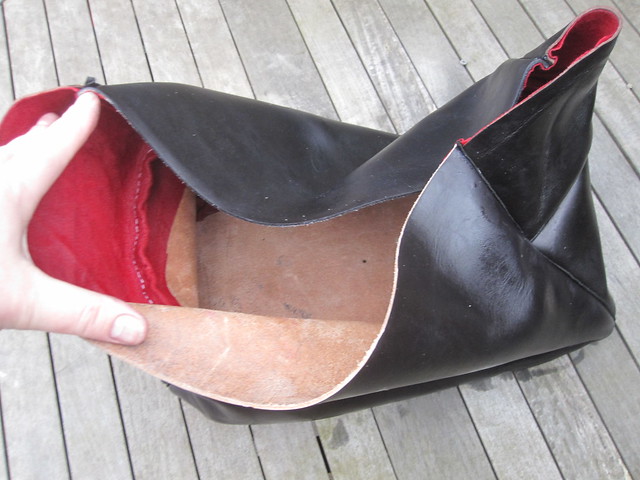
    The next stage is to mark holes for stitching and decide where the chicargo screws are going to go

    Thanks for looking

    Michael

  2. The Following User Says Thank You to MY63 For This Useful Post:

    reprieve (February 24th, 2015)

  3. #102
    Senior Member
    Join Date
    May 2013
    Location
    UK
    Posts
    1,233
    Thanks
    793
    Thanked 2,008 Times in 819 Posts
    Rep Power
    12

    Default Re: Custom Bag

    I had two small hold ups today I wanted to test the strength of the leather thong I used to attach the key I felt that if it held the weight of the bag that would be strong enough.
    Well it was not so I went to the suppliers to get some that was strong enough I also picked up another chicargo screw as I managed to loose half of one of the original four.
    The mounting points are now fitted and are very secure.
    I was a little unhappy with edges so I have sanded them all down and have started refinishing them.
    After the edges are complete I promise I will let it go (honest)

    My next project will be either a messenger bag from scratch or one of the Gladstone bags which I have it was awaiting restoration however the leather has been wet at some point and is rotten, The hardware is in fantastic condition and will form the basis of the new bag.

    Thanks

    Michael

  4. #103
    Senior Member
    Join Date
    May 2013
    Location
    UK
    Posts
    1,233
    Thanks
    793
    Thanked 2,008 Times in 819 Posts
    Rep Power
    12

    Default Re: Custom Bag

    I have spent some time on the edges today and I am almost happy with them I freely admit I am a bit of a perfectionist and the case is at least 50 years old so the odd bit of cracking around the edges is to be expected

    The first picture shows the mounting point for the shoulder strap I had thought I would be able to sew the tab in place as well as gluing and bolting it in place this was not possible.
    I took the bag to my supplier and their master saddler checked the mounting points for me he was happy with them.

    IMG_9568 by my0771, on Flickr

    IMG_9571 by my0771, on Flickr

    These are my final pictures of this project I will be boxing it up today ready for the courier to collect
    Thanks to everyone for the support.

    Michael

  5. The Following 4 Users Say Thank You to MY63 For This Useful Post:

    Crazyorange (February 26th, 2015), earthdawn (July 6th, 2015), reprieve (February 26th, 2015), Tracy Lee (February 27th, 2015)

  6. #104
    Senior Member Crazyorange's Avatar
    Join Date
    Feb 2014
    Posts
    1,729
    Thanks
    4,663
    Thanked 2,016 Times in 837 Posts
    Rep Power
    12

    Default Re: Custom Bag

    Looks wonderful.

  7. The Following User Says Thank You to Crazyorange For This Useful Post:

    MY63 (February 26th, 2015)

  8. #105
    Senior Member reprieve's Avatar
    Join Date
    Apr 2013
    Location
    just a little bird floating on a hurricane
    Posts
    958
    Thanks
    1,791
    Thanked 987 Times in 439 Posts
    Rep Power
    12

    Default Re: Custom Bag

    Wow!!
    It looks fantastic!!


    PS: I tried to send you a PM, but your inbox is full.

  9. The Following User Says Thank You to reprieve For This Useful Post:

    MY63 (February 26th, 2015)

  10. #106
    Senior Member inlovewithjournals's Avatar
    Join Date
    Jan 2014
    Location
    Calgary, Alberta, Canada
    Posts
    454
    Thanks
    898
    Thanked 272 Times in 147 Posts
    Rep Power
    11

    Default Re: Custom Bag

    Beautiful.
    Check out my blog: http://inlovewithjournals.wordpress.com/


    The perfect place for a writer is in the hideous roar of a city, with men making a new road under his window in competition with a barrel organ, and on the mat a man waiting for the rent. - Henry Vollam Morton

  11. The Following User Says Thank You to inlovewithjournals For This Useful Post:

    MY63 (February 26th, 2015)

  12. #107
    Senior Member
    Join Date
    May 2013
    Location
    UK
    Posts
    1,233
    Thanks
    793
    Thanked 2,008 Times in 819 Posts
    Rep Power
    12

    Default Re: Custom Bag

    As one project is on its way to a new home a new project takes its place I have been wanting to restore this bag since it arrived. unfortunately the leather was too far gone to allow for restoration.
    However with a little trigger logic the restoration will proceed for those not already aware of "Only fools and horses" tv show here is a sample of Trigger logic.

    https://www.youtube.com/watch?v=BUl6PooveJE

    I had assumed that the colour of this bag had been changed from a tan or light brown colour to a black however when taking the bag apart I found that the piping (leather between the joints) was also black, and the inside edges of the joints were also black so it would appear that this bag was black from the day it was made.

    IMG_9618 by my0771, on Flickr

    Here is an exploded view of the bag in pieces only the base is missing.

    IMG_9623_1 by my0771, on Flickr

    The inside of the bag has these unusual pockets possibly for medicine bottles I don't intend to replace these as I dint carry medicine bottles.

    IMG_9605 by my0771, on Flickr

    Yesterday I bought a shoulder of veg tanned leather and I have started making templates for the replacement panels

    IMG_9617 by my0771, on Flickr

    These templates will be glued to heavier card at the end of the project and wrapped in lining fabric before being glued to the inside of the bag to reinforce the sides.

    Thanks for looking

    Michael

  13. #108
    Senior Member Crazyorange's Avatar
    Join Date
    Feb 2014
    Posts
    1,729
    Thanks
    4,663
    Thanked 2,016 Times in 837 Posts
    Rep Power
    12

    Default Re: Custom Bag

    Ha ha....that video is great.
    It will be interesting to see if you can make something nice from the beaten bag. It's looking very sad.

  14. #109
    Senior Member
    Join Date
    May 2013
    Location
    UK
    Posts
    1,233
    Thanks
    793
    Thanked 2,008 Times in 819 Posts
    Rep Power
    12

    Default Re: Custom Bag

    Quote Originally Posted by Crazyorange View Post
    Ha ha....that video is great.
    It will be interesting to see if you can make something nice from the beaten bag. It's looking very sad.
    Not only is it beaten it is also rotten

    So I am going to make a new bag I hope I might be able to save some of the Handle but I am not making any promises.

    if you liked that clip try this one

    https://www.youtube.com/watch?v=LFuYIi5-igc
    enjoy

  15. #110
    Senior Member
    Join Date
    May 2013
    Location
    UK
    Posts
    1,233
    Thanks
    793
    Thanked 2,008 Times in 819 Posts
    Rep Power
    12

    Default Re: Custom Bag

    This piece of leather is called a pair of shoulders if you can see the pencil marks I have marked out two sides two lower ends and one base

    IMG_9628_1 by my0771, on Flickr

    The remaining pieces are the upper end pieces which are going to be made from 1 mm kip leather as it needs to fold in on itself as the bag closes

    The ruler is 500 mm long

  16. The Following User Says Thank You to MY63 For This Useful Post:

    Crazyorange (March 3rd, 2015)

  17. #111
    Senior Member
    Join Date
    May 2013
    Location
    UK
    Posts
    1,233
    Thanks
    793
    Thanked 2,008 Times in 819 Posts
    Rep Power
    12

    Default Re: Custom Bag

    I have now finished the rough cutting of all of the components

    IMG_9639_1 by my0771, on Flickr

    All I need to do now is to decide which colour I am going to use then I can dye all of the pieces then it is just a case of sewing it all together

    Thanks for looking

    Michael
    Last edited by MY63; March 4th, 2015 at 07:21 AM.

  18. #112
    Senior Member Crazyorange's Avatar
    Join Date
    Feb 2014
    Posts
    1,729
    Thanks
    4,663
    Thanked 2,016 Times in 837 Posts
    Rep Power
    12

    Default Re: Custom Bag

    How about a dark blue?

  19. #113
    Senior Member
    Join Date
    May 2013
    Location
    UK
    Posts
    1,233
    Thanks
    793
    Thanked 2,008 Times in 819 Posts
    Rep Power
    12

    Default Re: Custom Bag

    Thanks I was struggling with black red issue the introduction of a third option suddenly made me realise that what I actually wanted to do was return it as close as possible to what it looked like when new.
    So it will be black hopefully today.

    It is good to have FP geeks back up.

  20. The Following User Says Thank You to MY63 For This Useful Post:

    Crazyorange (March 6th, 2015)

  21. #114
    Senior Member
    Join Date
    May 2013
    Location
    UK
    Posts
    1,233
    Thanks
    793
    Thanked 2,008 Times in 819 Posts
    Rep Power
    12

    Default Re: Custom Bag

    After spending half a day dying all 7 pieces black the time has come to start re assembly of this case, The original leather had thin strips of leather as a spacer between each joint.
    I did not have any suitable leather and neither did my supplier so I decided to use black suede instead I think it will give an interesting contrast, but we will see.

    Assembly starts with the base I stitched the sides first followed by the lower end pieces the upper end pieces are made from a more flexible leather and will be lined in red suede before fitting.

    IMG_9735_1 by my0771, on Flickr

    IMG_9737_1 by my0771, on Flickr

    IMG_9739_1 by my0771, on Flickr

    There is a cardboard structure that is glued to the sides and lower ends which allows the case to maintain its shape over many years of use.

    Thanks for looking

    Michael

  22. #115
    Senior Member
    Join Date
    May 2013
    Location
    UK
    Posts
    1,233
    Thanks
    793
    Thanked 2,008 Times in 819 Posts
    Rep Power
    12

    Default Re: Custom Bag

    This is the upper end piece and is the most complicated piece to cut and prepare as it must fold to allow the bag to open and close in this picture you can see the old and the new side by side.

    IMG_9749_1 by my0771, on Flickr

    The eagle eyed may have noticed that the new piece is slightly larger than the old one this takes into account the fact that the old edges have curled.

    This piece does not have a backer board and needs to have the suede glued on with latex cement for flexibility but also because it needs to be sewn into place while it is wet to allow it to accept the required shape.
    It will become clear tomorrow (fingers crossed) in the mean time they will go back into the plastic bag.

    Thanks

    Michael

  23. The Following User Says Thank You to MY63 For This Useful Post:

    Crazyorange (March 15th, 2015)

  24. #116
    Senior Member
    Join Date
    May 2013
    Location
    UK
    Posts
    1,233
    Thanks
    793
    Thanked 2,008 Times in 819 Posts
    Rep Power
    12

    Default Re: Custom Bag

    This bag is getting serious now everything has been sewn together and the edges have been bound in red suede, I know the theory but have no idea if this is going to work

    IMG_9755 by my0771, on Flickr

    The upper end piece is backed in suede the sides and lower ends have a heavy card liner which will be wrapped in suede before it is glued in place

    IMG_9752_1 by my0771, on Flickr

    If you have not already worked it out the bag is sewn together inside out then the whole thing is soaked in cold water then turned the right way out so keep your fingers crossed.

    Thanks for looking

    Michael

  25. #117
    Senior Member
    Join Date
    May 2013
    Location
    UK
    Posts
    1,233
    Thanks
    793
    Thanked 2,008 Times in 819 Posts
    Rep Power
    12

    Default Re: Custom Bag

    Ta daaaaaaaaa
    So far so good after soaking the bag in cold water for about 10 minutes I pushed the base though the opening and pulled the seams into place

    IMG_9766_1 by my0771, on Flickr

    IMG_9765_1 by my0771, on Flickr

    The outside is now inside it might take a day or two to dry out completely

  26. The Following User Says Thank You to MY63 For This Useful Post:

    Crazyorange (March 17th, 2015)

  27. #118
    Senior Member
    Join Date
    May 2013
    Location
    UK
    Posts
    1,233
    Thanks
    793
    Thanked 2,008 Times in 819 Posts
    Rep Power
    12

    Default Re: Custom Bag

    Yesterday in between other things I sanded and put a first coat of enamel paint onto the metal work for this bag this morning I have sanded it down again

    IMG_9773_1 by my0771, on Flickr

    IMG_9770_1 by my0771, on Flickr

    The next step is to find a suitable leather to wrap the metal work in.

    Thanks for looking

    Michael

  28. #119
    Senior Member
    Join Date
    May 2013
    Location
    UK
    Posts
    1,233
    Thanks
    793
    Thanked 2,008 Times in 819 Posts
    Rep Power
    12

    Default Re: Custom Bag

    I know that some of you are interested in locks and how they work so here we go

    I have done a quick clean of the outside I am only removing the dirt that may stop the lock from working

    IMG_9775_1 by my0771, on Flickr

    This is the inside view

    IMG_9777_1 by my0771, on Flickr

    As you can see the inside also required a clean

    IMG_9780_1 by my0771, on Flickr

    I have brushed away all of the dust and fluff to reveal the inner workings of the lock

    IMG_9784_1 by my0771, on Flickr

    I will provide more details once I find a key that I can alter to fit

  29. The Following 3 Users Say Thank You to MY63 For This Useful Post:

    Crazyorange (March 20th, 2015), cwent2 (March 26th, 2015), elaineb (March 20th, 2015)

  30. #120
    Senior Member
    Join Date
    Feb 2015
    Location
    Boston, MA
    Posts
    215
    Thanks
    366
    Thanked 263 Times in 111 Posts
    Rep Power
    10

    Default Re: Custom Bag

    Thank you so much for the great photos and descriptions of what you're doing. I had no idea that you needed to sew the bag from the inside and then turn it, requiring the seams to fold and stay flat. (It's standard procedure when sewing cloth items, but cloth folds much more readily than leather!) Was it a lot of work after the leather was soaked?

    Can't wait to see how you handle the lock.

Bookmarks

Posting Permissions

  • You may not post new threads
  • You may not post replies
  • You may not post attachments
  • You may not edit your posts
  •