Page 13 of 17 FirstFirst ... 31112131415 ... LastLast
Results 241 to 260 of 335

Thread: Custom Bag

  1. #241
    Senior Member
    Join Date
    May 2013
    Location
    UK
    Posts
    1,233
    Thanks
    793
    Thanked 2,008 Times in 819 Posts
    Rep Power
    13

    Default Re: Custom Bag

    I have started making the replacement straps for the USAAF case in keeping with the rest of the case the straps have some detail on them.

    The detail is a pair of creases running parallel to the edges this crease is unusual as it is quite wide and originally was quite deep.

    To replicate it on the new strap I have used a stitching grove tool to give the required detail.

    DSC_0108[1] by my0771, on Flickr

    Next I used an edge rounding tool on the edges

    DSC_0110[1] by my0771, on Flickr

    Now for the tricky bit dying I started with saddle tan

    DSC_0112[1] by my0771, on Flickr

    After some trial and error and a trip to the supplier I came to this

    DSC_0116[1] by my0771, on Flickr

    The title is boot brown but I think it is between saddle tan and brown although I did thin it by 50% I think another coat will do it.

  2. The Following 4 Users Say Thank You to MY63 For This Useful Post:

    Crazyorange (September 18th, 2015), Laura N (October 4th, 2015), Mr. Reader (June 16th, 2016), mrcharlie (September 19th, 2015)

  3. #242
    Senior Member
    Join Date
    May 2013
    Location
    UK
    Posts
    1,233
    Thanks
    793
    Thanked 2,008 Times in 819 Posts
    Rep Power
    13

    Default Re: Custom Bag

    I have not done much over the last week while I recovered from some minor surgery.

    To help me along I was looking for a small project to keep me busy many years ago I had a watch that I really liked but the strap kept wearing through where the padded areas met the buckle.

    Anyway I found the watch and half of the strap in a drawer and thought I would have a go.

    This is the original well half of it

    DSC_0139[1] by my0771, on Flickr

    Here is my first attempt at a replacement

    DSC_0142[1] by my0771, on Flickr

    My first watch strap I made the piece without the buckle longer but unfortunately not long enough as it does not fit my wrist

    The dye also went a bit wonky.

    DSC_0144[1] by my0771, on Flickr

    Version two to follow soon

    I also bought this and it was delivered today it is an English bridle hide made by J E Sedgewick it is larger than I planned on buying but that is the way leather is you tell them the size that you want and the send you a hide as close as possible to what you ordered usually bigger.

    DSC_0146[1] by my0771, on Flickr

    The colour is London Tan and it is going to be a brief case in fact it might well be two and some other small cases.

    The thread for the USAAF case also came in the same package

    DSC_0137[1] by my0771, on Flickr

    Thanks for looking

    Michael

  4. The Following 2 Users Say Thank You to MY63 For This Useful Post:

    Crazyorange (September 21st, 2015), Mr. Reader (June 16th, 2016)

  5. #243
    Senior Member
    Join Date
    May 2013
    Location
    UK
    Posts
    1,233
    Thanks
    793
    Thanked 2,008 Times in 819 Posts
    Rep Power
    13

    Default Re: Custom Bag

    The USAAF case is almost ready for re assembly I have wet formed the liner for the gusset piece today

    DSC_0149[1] by my0771, on Flickr

    DSC_0151[1] by my0771, on Flickr

    I will add the centre dividers and then allow it to dry overnight I will glue it in place tomorrow

  6. The Following 2 Users Say Thank You to MY63 For This Useful Post:

    Crazyorange (September 22nd, 2015), Mr. Reader (June 16th, 2016)

  7. #244
    Senior Member
    Join Date
    May 2013
    Location
    UK
    Posts
    1,233
    Thanks
    793
    Thanked 2,008 Times in 819 Posts
    Rep Power
    13

    Default Re: Custom Bag

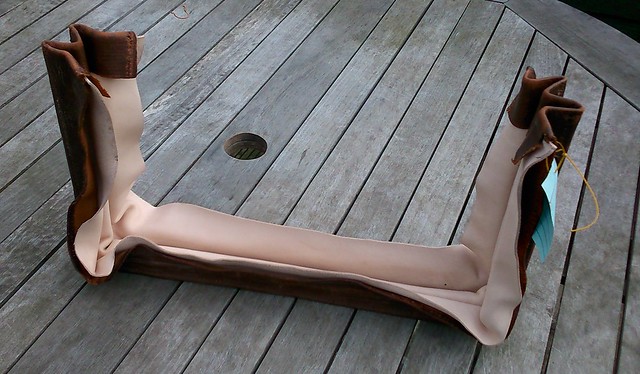
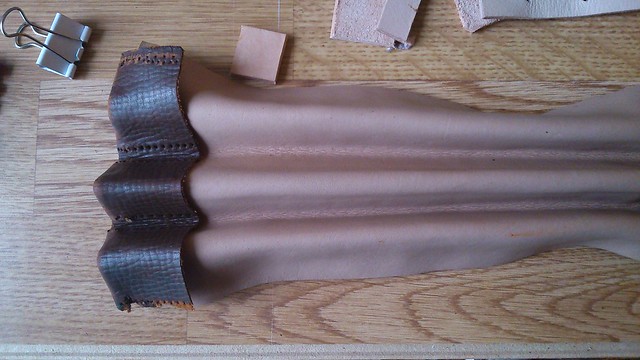
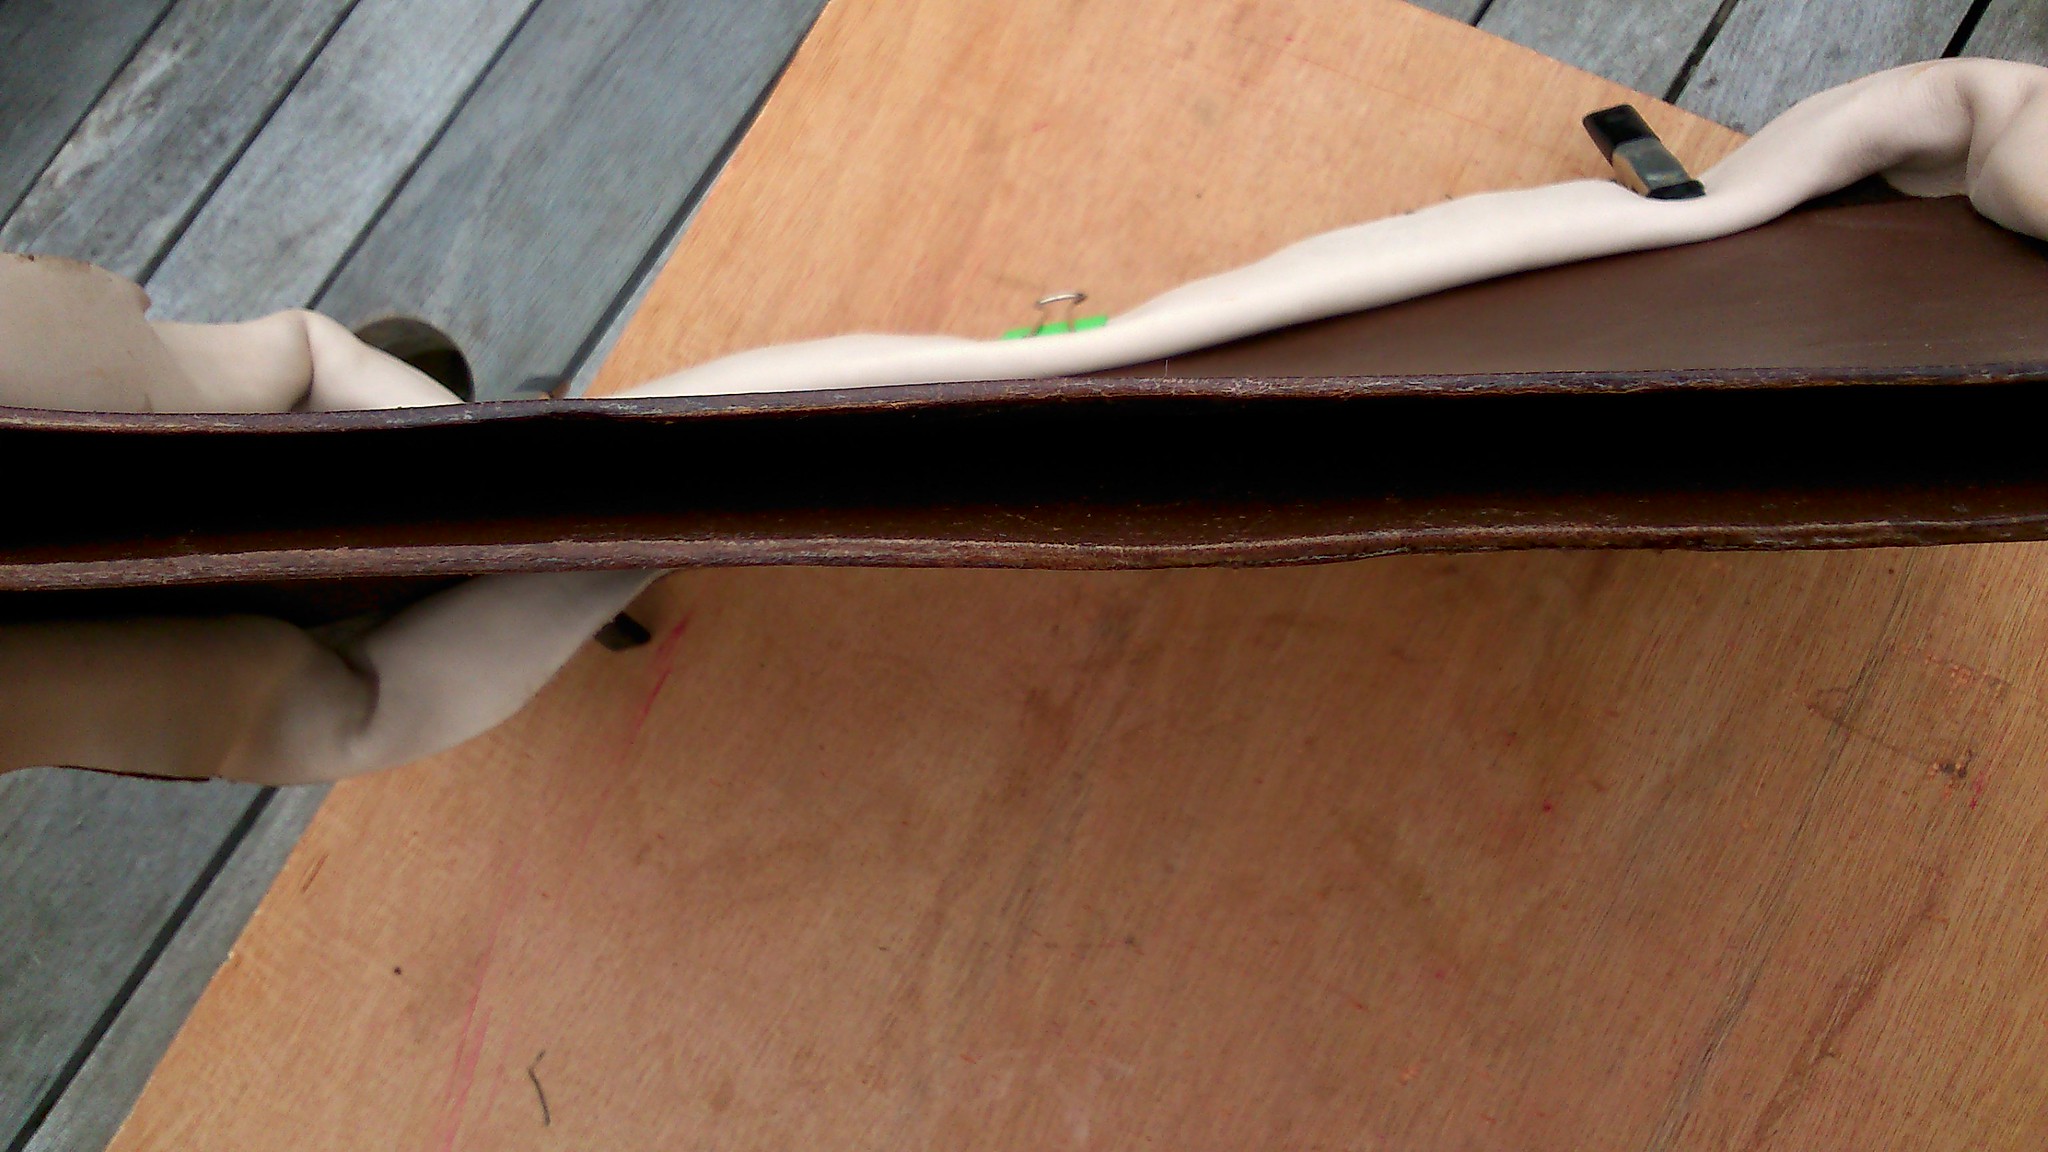
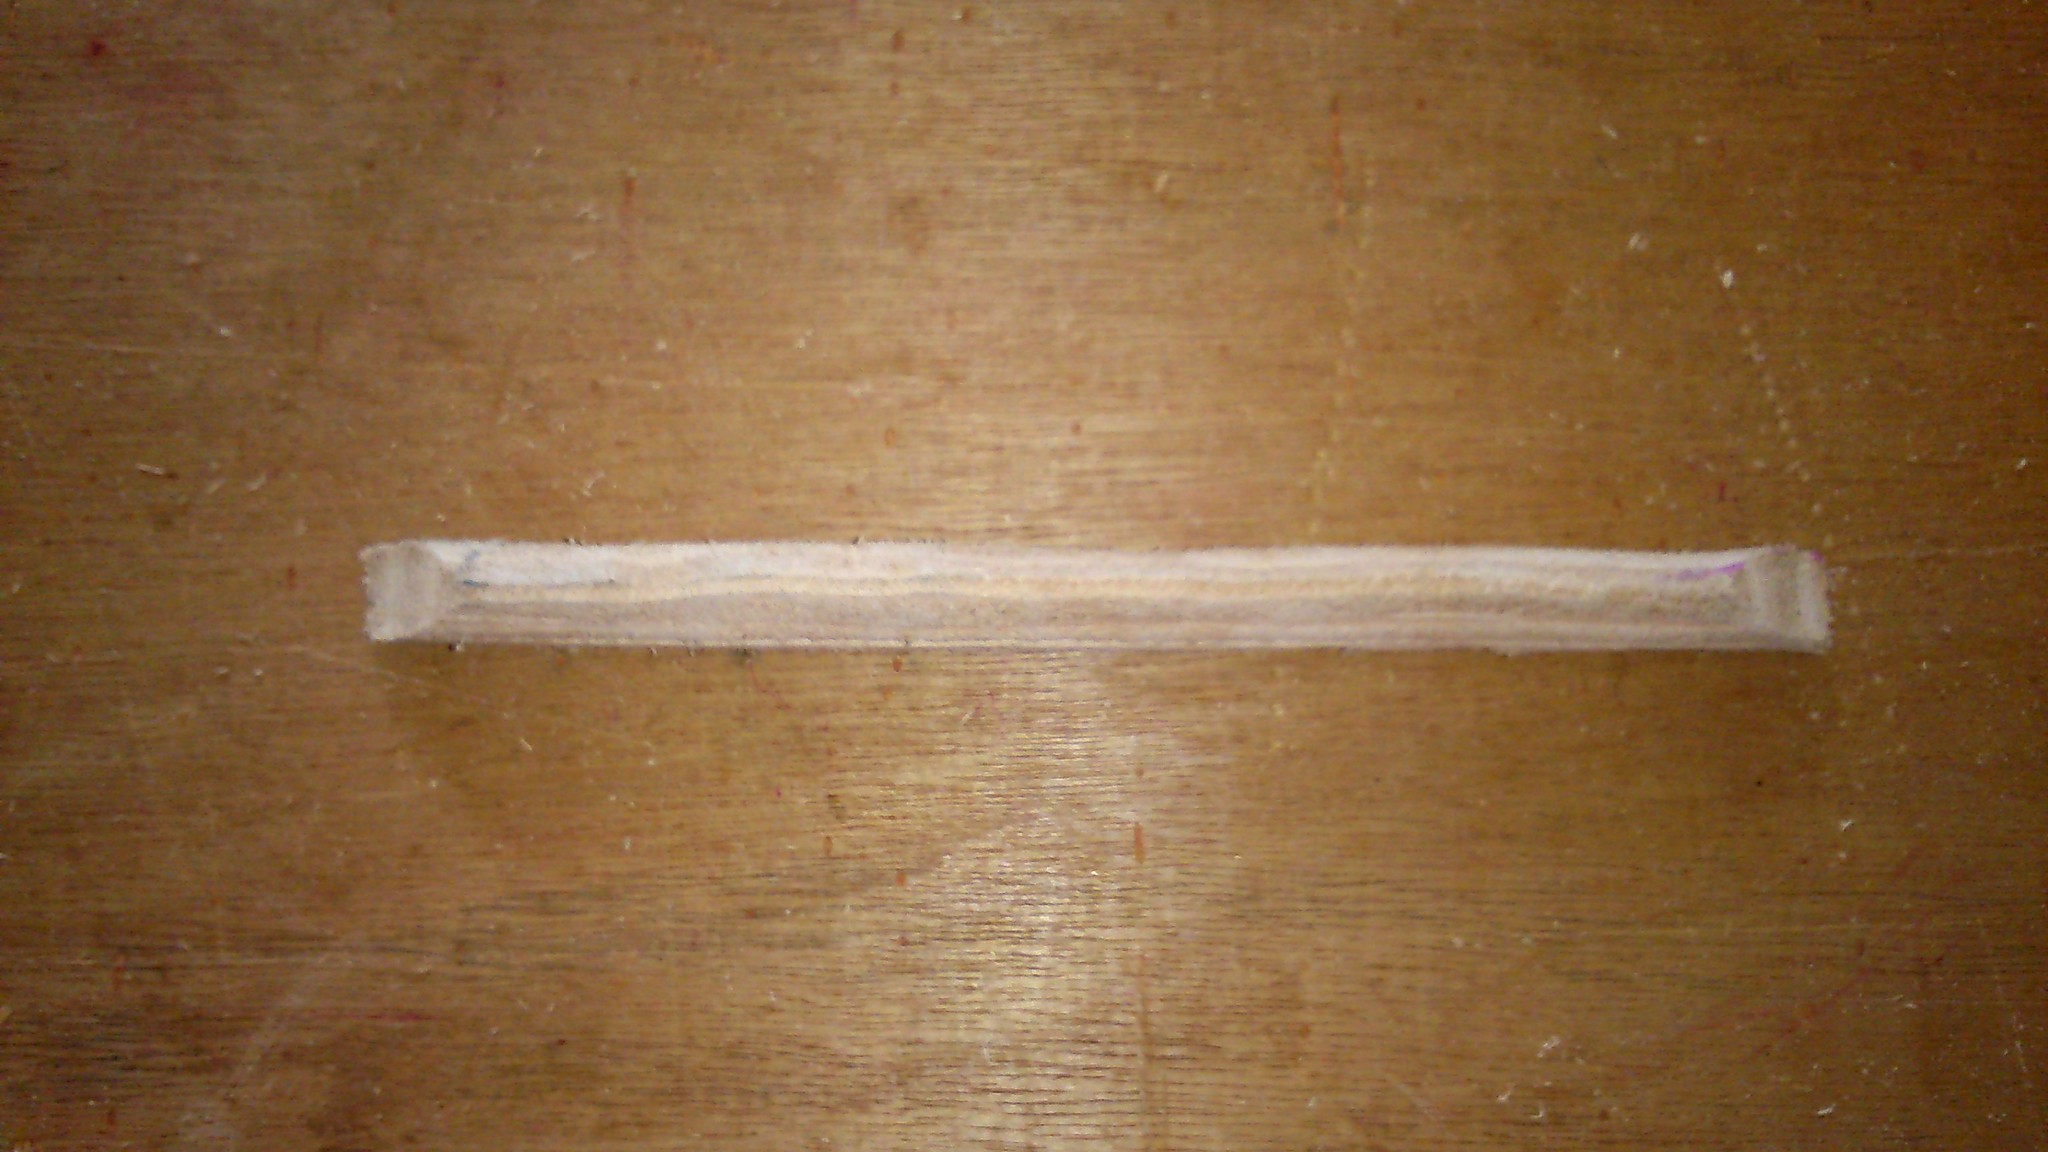
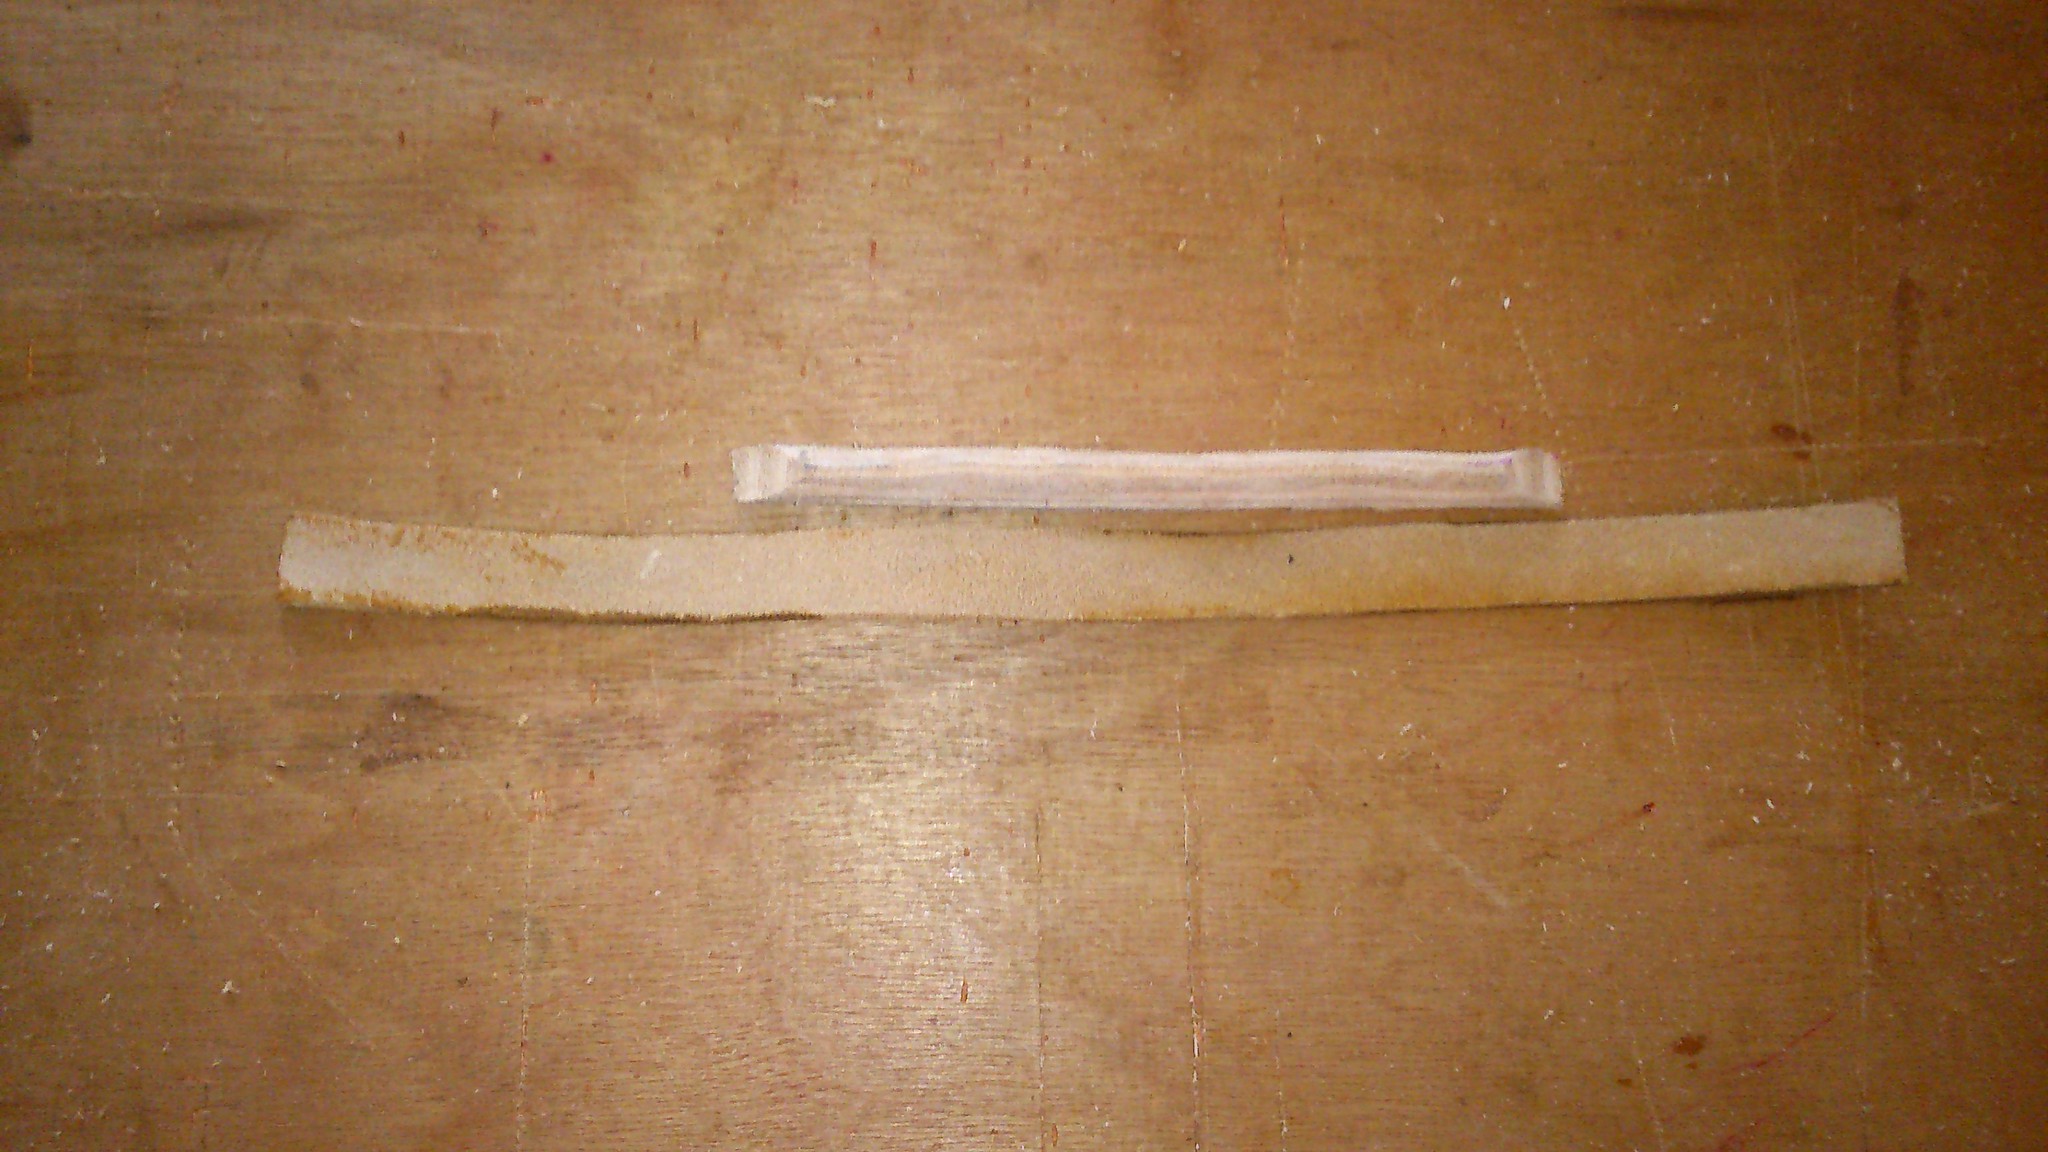
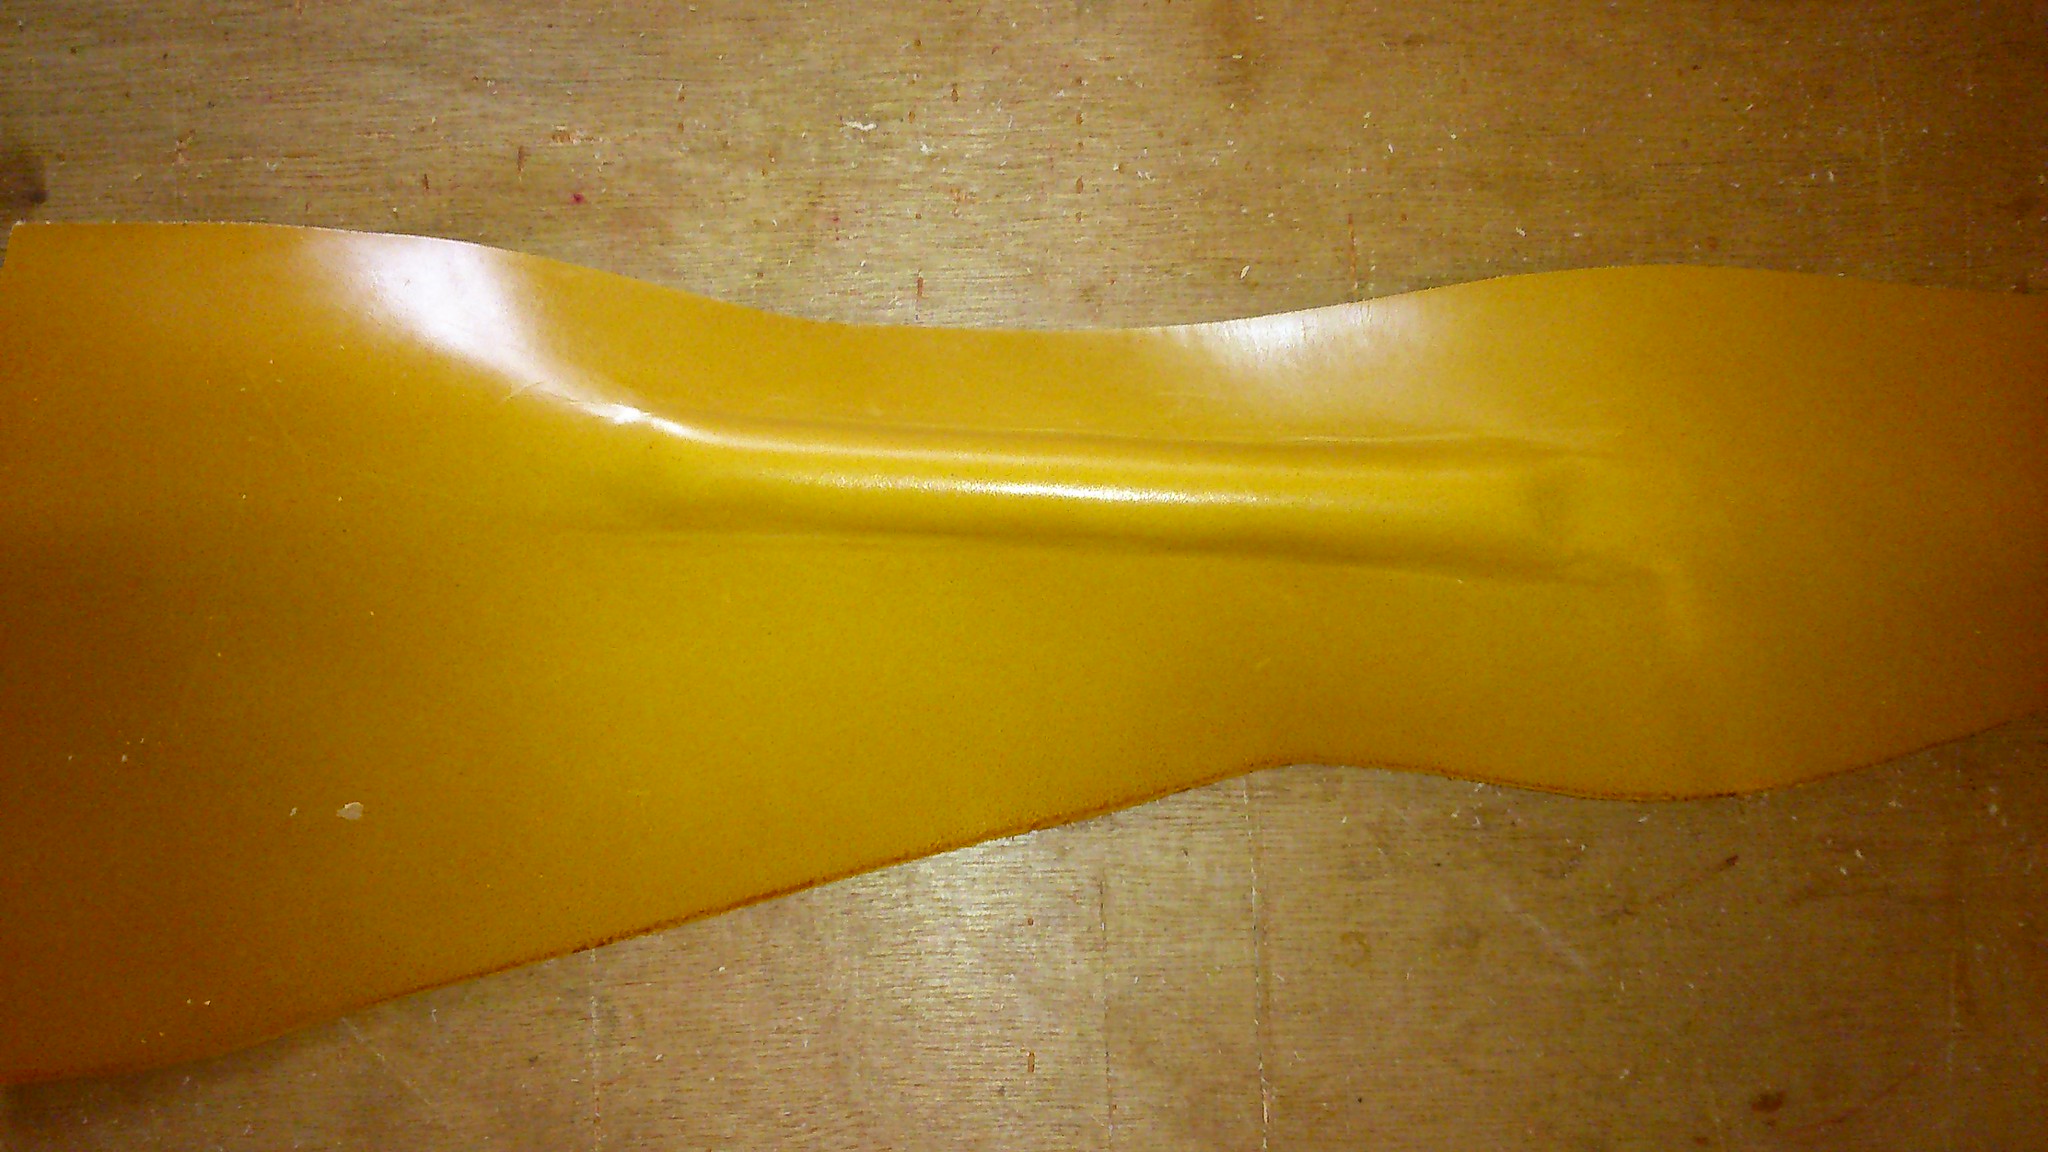
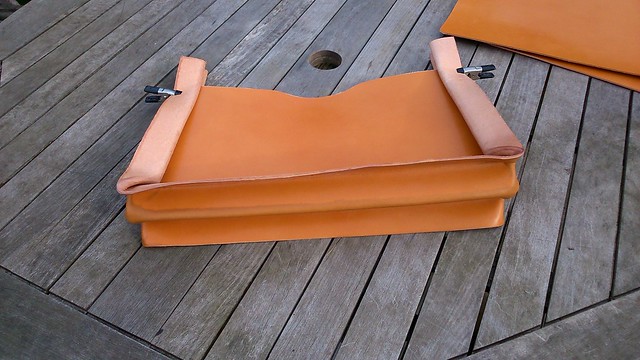
    The lining leather which I wet moulded yesterday has dried overnight and is now waiting to be glued together.

    DSC_0154[1] by my0771, on Flickr

    As you can see the lining leather has added to the integrity of the gusset piece already. In normal circumstances I would not always glue the lining in place as there will be plenty of stitching to secure it. In this case I want the lining to be completely joined to the original piece as tis will prevent any future tearing or splitting of the outer leather.

  8. The Following 2 Users Say Thank You to MY63 For This Useful Post:

    Crazyorange (September 23rd, 2015), Mr. Reader (June 16th, 2016)

  9. #245
    Senior Member
    Join Date
    May 2013
    Location
    UK
    Posts
    1,233
    Thanks
    793
    Thanked 2,008 Times in 819 Posts
    Rep Power
    13

    Default Re: Custom Bag

    Before I can re assemble this case I need to sort the edges of the dividers which are made from two pieces of leather glued together.

    I could have just ran a bead of glue along the top and left it at that, but I have used a knife and bone folder to open up the joint and then added glue then applied pressure to bring the pieces together.

    DSC_0159[1] by my0771, on Flickr

    DSC_0156[1] by my0771, on Flickr

    when the glue has dried I will sand and refinish the edges with beeswax.

  10. The Following 2 Users Say Thank You to MY63 For This Useful Post:

    Crazyorange (September 23rd, 2015), Mr. Reader (June 16th, 2016)

  11. #246
    Senior Member
    Join Date
    May 2013
    Location
    UK
    Posts
    1,233
    Thanks
    793
    Thanked 2,008 Times in 819 Posts
    Rep Power
    13

    Default Re: Custom Bag

    I like shinny things earlier in the week I ordered a lock and handle fittings for my new case they are all solid brass and made in the UK.

    The only item I need now is the meatal bar that the handle attaches to on the other side of the leather it stops the case sagging when you pick it up.

    DSC_0169[1] by my0771, on Flickr

    DSC_0167[1] by my0771, on Flickr

    DSC_0168[1] by my0771, on Flickr

  12. The Following 5 Users Say Thank You to MY63 For This Useful Post:

    Crazyorange (September 23rd, 2015), Hawk (September 23rd, 2015), Mr. Reader (June 16th, 2016), mrcharlie (September 23rd, 2015), Waltman (September 23rd, 2015)

  13. #247
    Senior Member
    Join Date
    May 2013
    Location
    UK
    Posts
    1,233
    Thanks
    793
    Thanked 2,008 Times in 819 Posts
    Rep Power
    13

    Default Re: Custom Bag

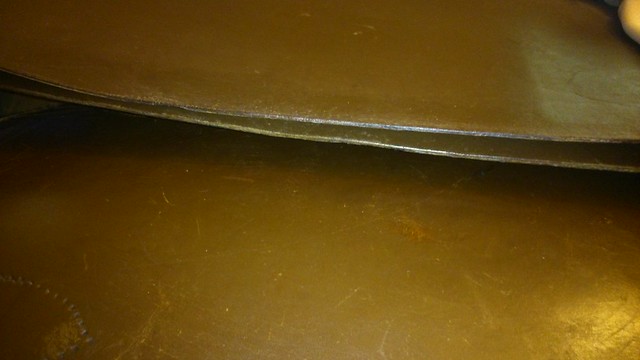
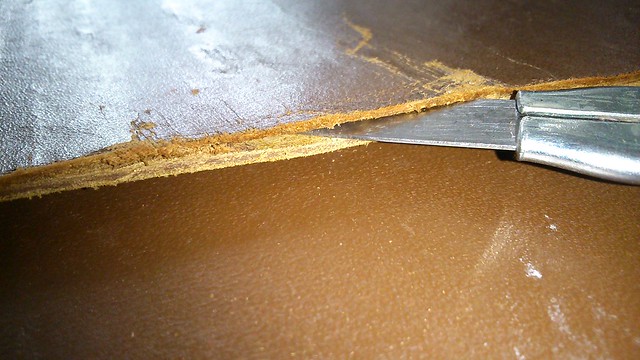
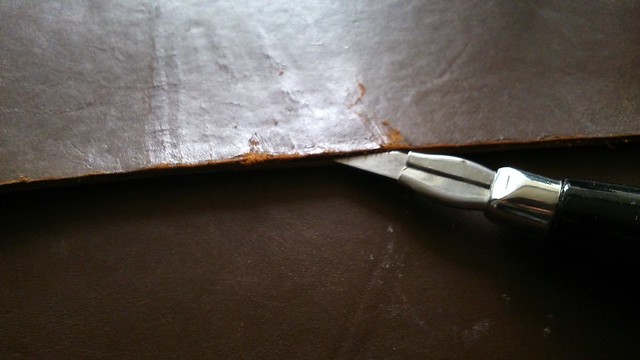
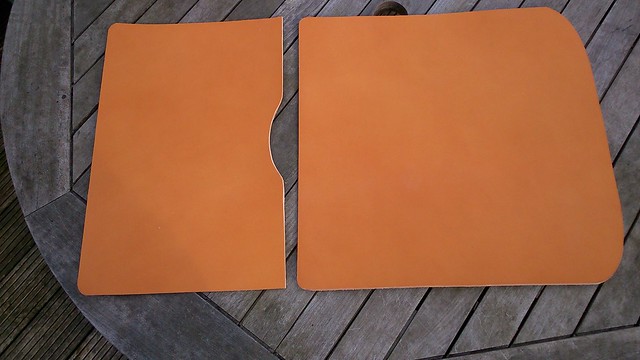
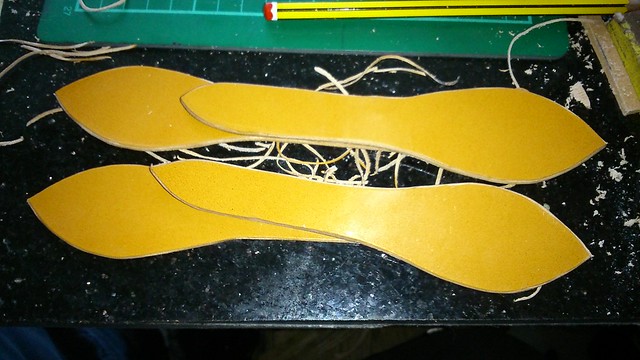
    Here are the two internal dividers with the repaired edges.

    DSC_0175[1] by my0771, on Flickr

    I have also glued all of the linings to the outer pieces of the case. All of the lining leather is to be left the natural colour it will only have a protective coat of wax.

    I am still mixing dye to try and get a colour match that I am happy with

  14. The Following 2 Users Say Thank You to MY63 For This Useful Post:

    Crazyorange (September 24th, 2015), Mr. Reader (June 16th, 2016)

  15. #248
    Senior Member
    Join Date
    May 2013
    Location
    UK
    Posts
    1,233
    Thanks
    793
    Thanked 2,008 Times in 819 Posts
    Rep Power
    13

    Default Re: Custom Bag

    Hi Intelidepth if you decide to have a go I would be happy to help you in any way that I can.

    The colour is a bit off I am using my phone camera as my little canon does not like windows 10 I am hoping Santa may bring me a new camera

    At least the colour is off on both the new straps and the case equally.

    DSC_0197[1] by my0771, on Flickr

    The repairs to the dividers are now complete and the edges that are visible have had beeswax applied and they have been burnished which means rubbed with a piece of hardwood or rough cloth to cause friction and melt into the pours of the leather.

    DSC_0200[1] by my0771, on Flickr

    Front and rear pieces test fitting to make sure they still fit

    DSC_0202[1] by my0771, on Flickr

    This was the position earlier in the week before my recent hospital visit to have more injections into my damaged hand to keep it working for another three months. I have also started to sew the dividers into the gusset piece I knew this would be tricky before I began and I was not disappointed

  16. The Following 6 Users Say Thank You to MY63 For This Useful Post:

    Crazyorange (October 2nd, 2015), earthdawn (October 2nd, 2015), Hawk (October 2nd, 2015), Laura N (October 4th, 2015), Mr. Reader (June 16th, 2016), mrcharlie (October 3rd, 2015)

  17. #249
    Senior Member
    Join Date
    May 2013
    Location
    UK
    Posts
    1,233
    Thanks
    793
    Thanked 2,008 Times in 819 Posts
    Rep Power
    13

    Default Re: Custom Bag

    Time for re assembly of the USAAF case. I have finished sewing the dividers into the gusset piece and the handle plates along with the pocket that holds the metal support bar.
    As these pieces are visible have used the existing holes where possible.

    DSC_0247[1] by my0771, on Flickr

    I plan to thin the edges of the leather before I attach he front and rear pieces. this will involve marking a line around the inside edge and using a very sharp round knife removing a strip of leather from that area.

    Talking of really sharp knives I have been putting it to good use my own case has progressed from a piece of 11 square feet I now have this.
    The first piece cut was he straps followed by the long piece which is the gusset piece then the back front and divider were cut out the smaller pieces to the left and the top are what was left these will be used for the handle and the fasteners.

    Rather than cutting for minimum wastage I have selected the very best parts of the hide for the important sections like front and the flap.

    DSC_0252[1] by my0771, on Flickr

    Here we have all of the pieces leather and hardware that are needed to make the case.

    DSC_0254[1] by my0771, on FlickrThanks for looking

    Michael
    Last edited by MY63; October 4th, 2015 at 10:07 AM.

  18. The Following 4 Users Say Thank You to MY63 For This Useful Post:

    Crazyorange (October 4th, 2015), cwent2 (October 4th, 2015), Laura N (October 4th, 2015), Mr. Reader (June 16th, 2016)

  19. #250
    Senior Member
    Join Date
    May 2013
    Location
    UK
    Posts
    1,233
    Thanks
    793
    Thanked 2,008 Times in 819 Posts
    Rep Power
    13

    Default Re: Custom Bag

    After struggling with the colour of this case for some time I realised that as I had used a saddle tan dye with lots of coats the orange tint I was blaming on my phone camera was actually down to the background tint of the dye.

    So I used a darker dye diluted to cover that tint and make the case even closer to its original colour.

    USAAF 1 case by my0771, on Flickr

    DSC_0277[1] by my0771, on Flickr

    DSC_0280[1] by my0771, on Flickr

    DSC_0286[1] by my0771, on Flickr

    DSC_0284[1] by my0771, on Flickr

    I am in the process of finishing the edges and once that is complete it will be time to send it back to its home in the USA.

    It has taken a long time to bring this case back to a useable condition and I Think it will be good for another 70 years.

    Thanks for looking

    Michael

  20. The Following 3 Users Say Thank You to MY63 For This Useful Post:

    Monz (October 8th, 2015), Mr. Reader (June 16th, 2016), mrcharlie (October 9th, 2015)

  21. #251
    Senior Member Crazyorange's Avatar
    Join Date
    Feb 2014
    Posts
    1,729
    Thanks
    4,663
    Thanked 2,016 Times in 837 Posts
    Rep Power
    12

    Default Re: Custom Bag

    Beautiful work Michael.

  22. The Following 2 Users Say Thank You to Crazyorange For This Useful Post:

    Mr. Reader (June 16th, 2016), MY63 (October 8th, 2015)

  23. #252
    Senior Member
    Join Date
    May 2013
    Location
    UK
    Posts
    1,233
    Thanks
    793
    Thanked 2,008 Times in 819 Posts
    Rep Power
    13

    Default Re: Custom Bag

    All other projects are finished so now is the ideal time to make my case.

    I cut the hide into the small pieces so it is time to start making the parts, I have started with the handle the first step was to glue some strips of leather together after a little shaping I have this.

    DSC_0365[1] by my0771, on Flickr

    The handle plates and rings have a maximum inside diameter of 22mm and the outer leather is 2 mm thick so 18mm was the maximum size I could use but I decided to reduce it to 16 mm to give a little room.

    DSC_0367[1] by my0771, on Flickr

    Here you can see the outer cover being shaped around the leather blank

    DSC_0369[1] by my0771, on Flickr

    The handle assembly seen from the top the long ends fold under the handle then the side flaps fold around.

    DSC_0370[1] by my0771, on Flickr

    I have folded the handle end underneath to demonstrate that.

    DSC_0377[1] by my0771, on Flickr

    I know have my usual dilemma what colour for the inside and also for the thread. I have red and green.

  24. The Following 2 Users Say Thank You to MY63 For This Useful Post:

    Laura N (October 16th, 2015), Mr. Reader (June 16th, 2016)

  25. #253
    Senior Member
    Join Date
    May 2013
    Location
    UK
    Posts
    1,233
    Thanks
    793
    Thanked 2,008 Times in 819 Posts
    Rep Power
    13

    Default Re: Custom Bag

    Handle assembly with rings and plates as you can see I used the green thread so it will be green suede for the interior

    DSC_0379[1] by my0771, on Flickr

    I still need to stitch the top edge

    DSC_0381[1] by my0771, on Flickr

    Thanks for looking

    Michael

  26. The Following 3 Users Say Thank You to MY63 For This Useful Post:

    Crazyorange (October 16th, 2015), Laura N (October 16th, 2015), mrcharlie (October 17th, 2015)

  27. #254
    Senior Member
    Join Date
    May 2013
    Location
    UK
    Posts
    1,233
    Thanks
    793
    Thanked 2,008 Times in 819 Posts
    Rep Power
    13

    Default Re: Custom Bag

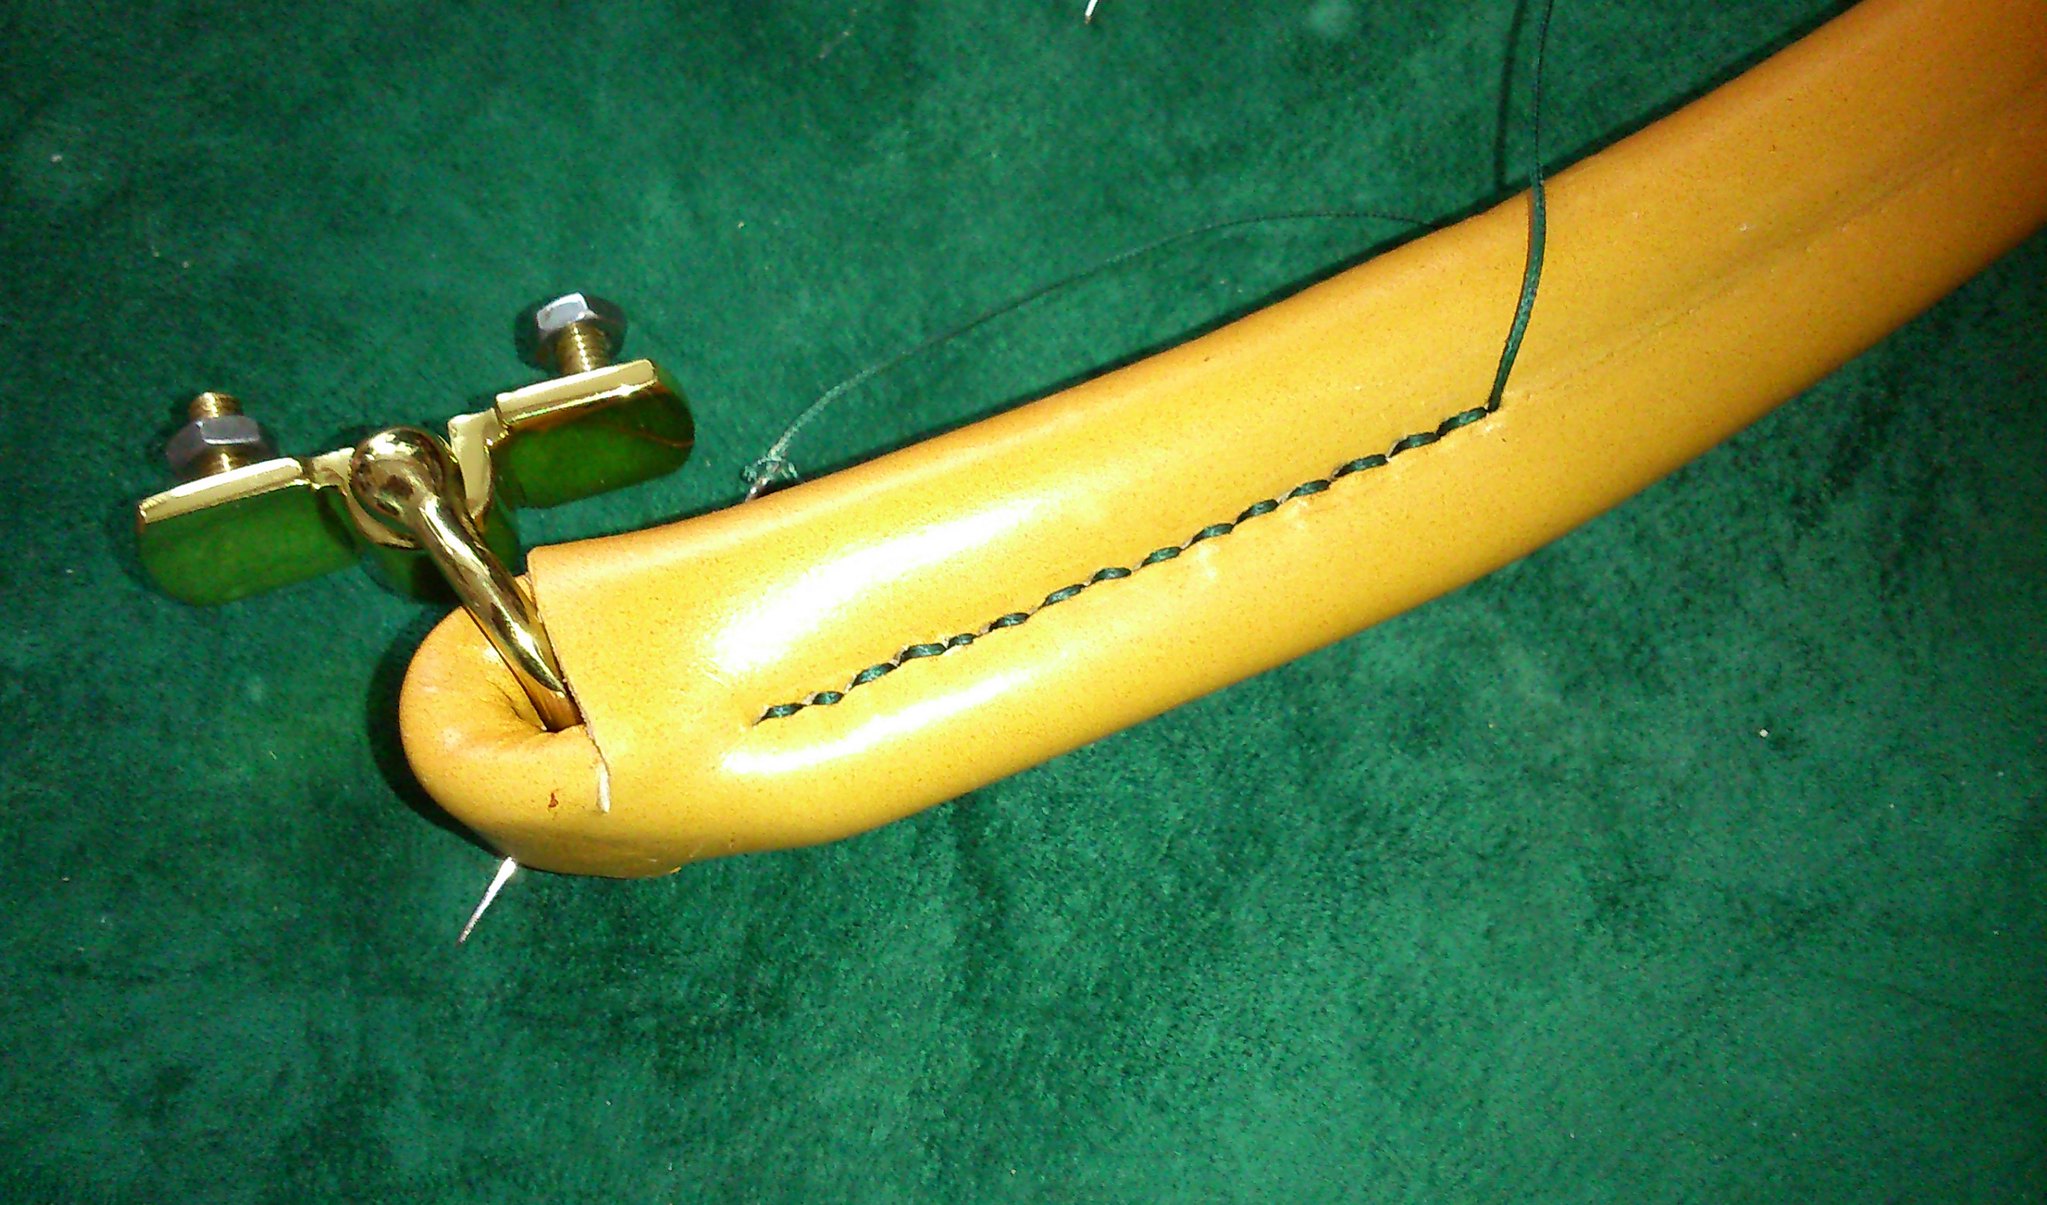
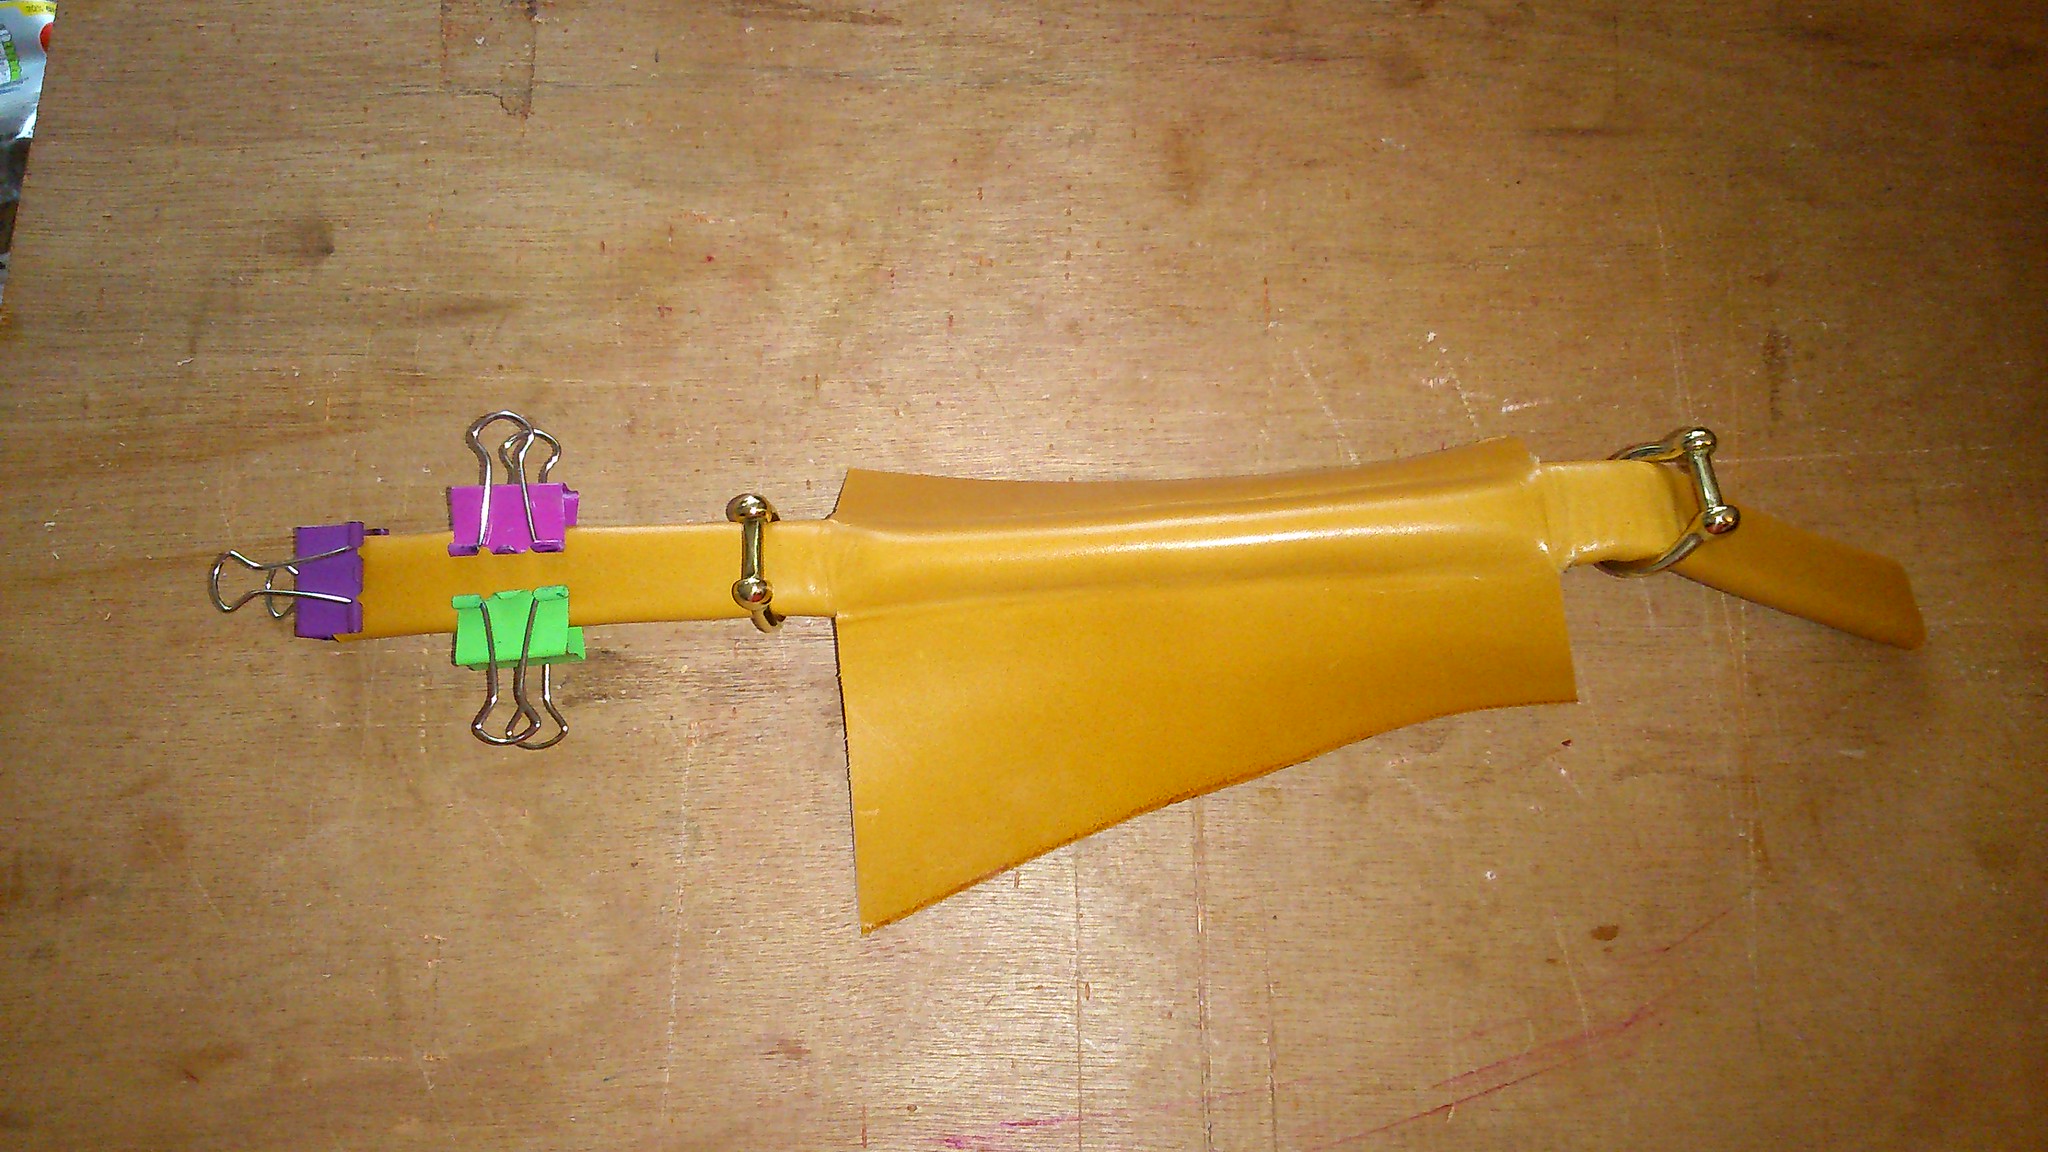
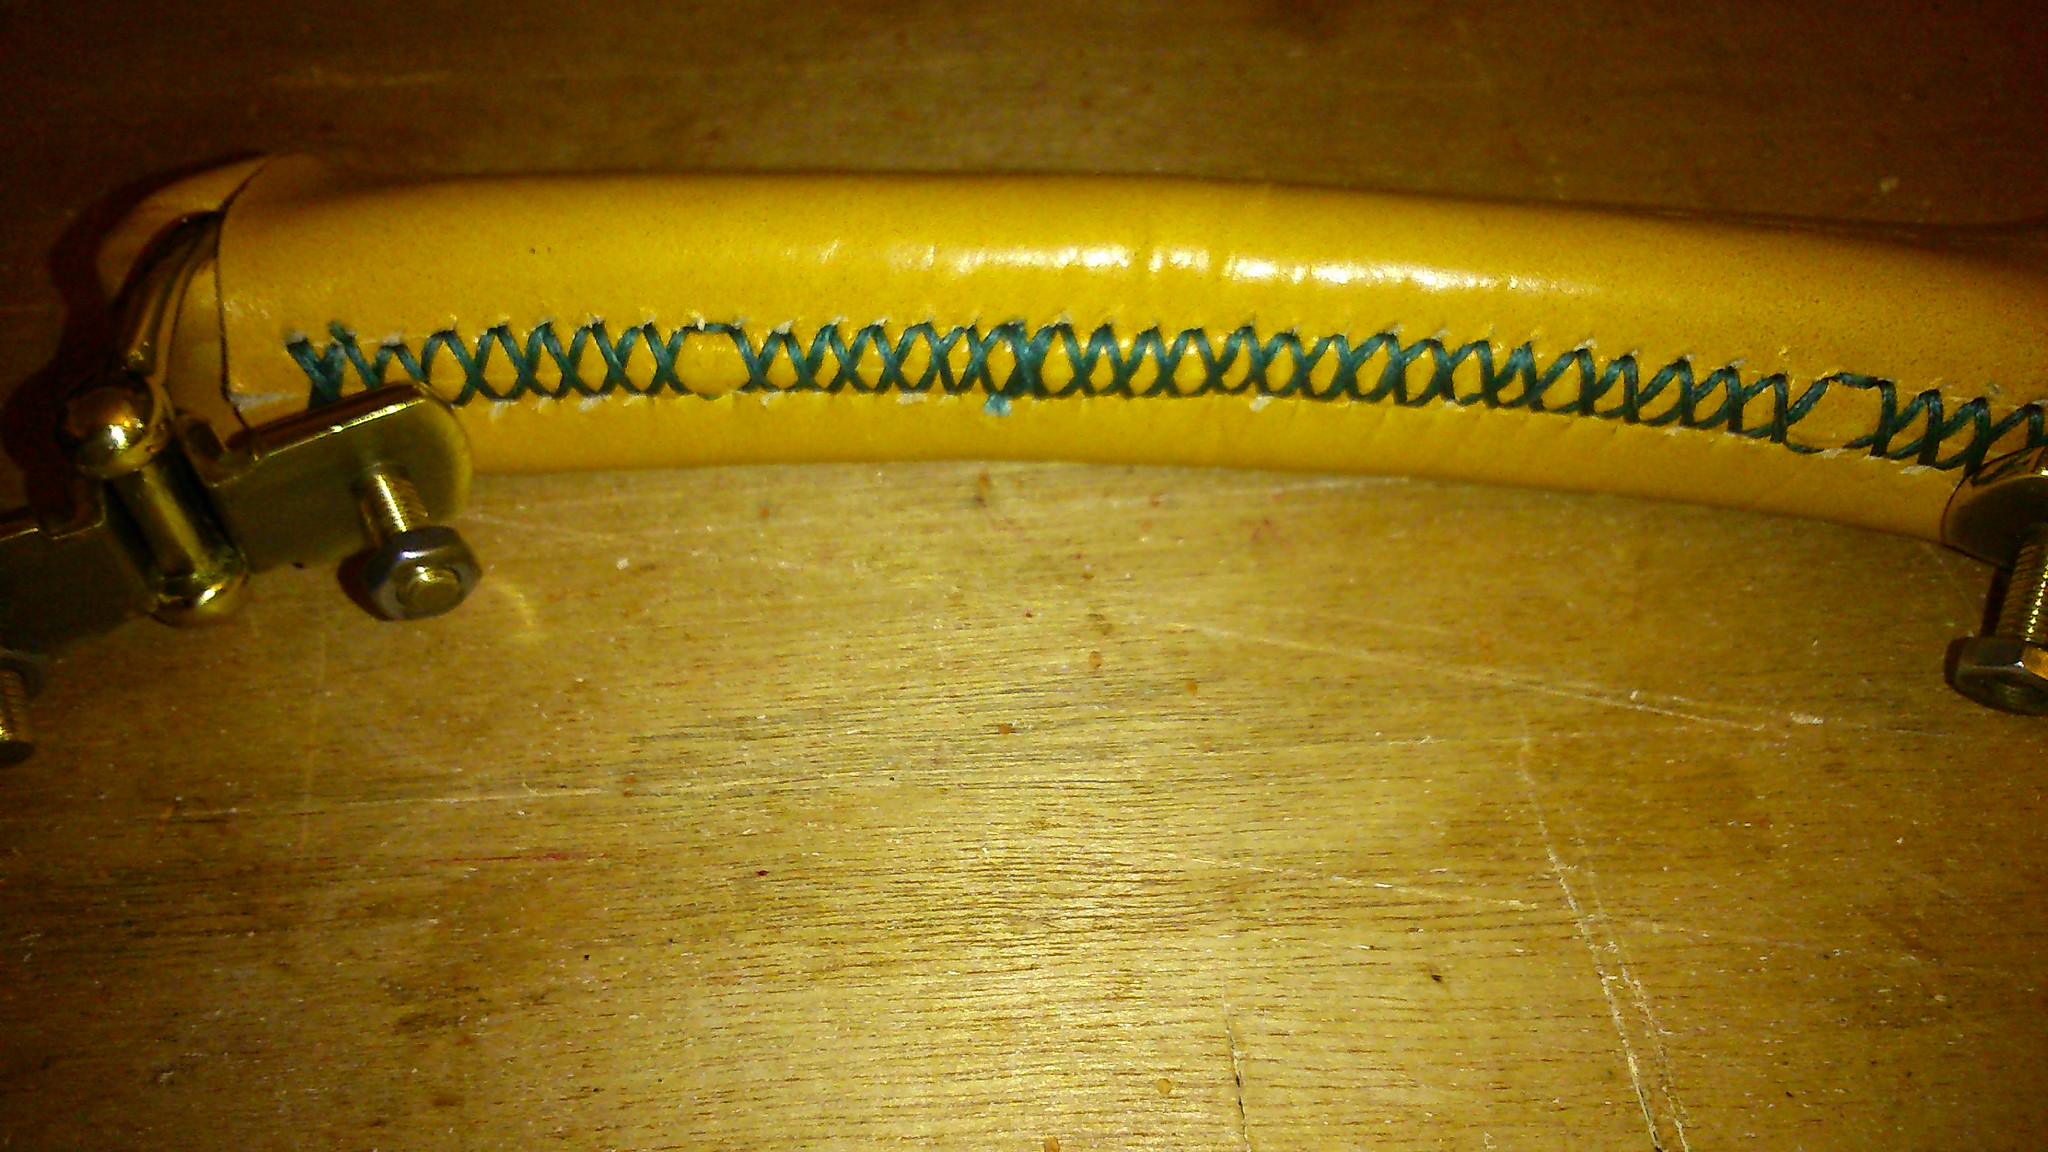
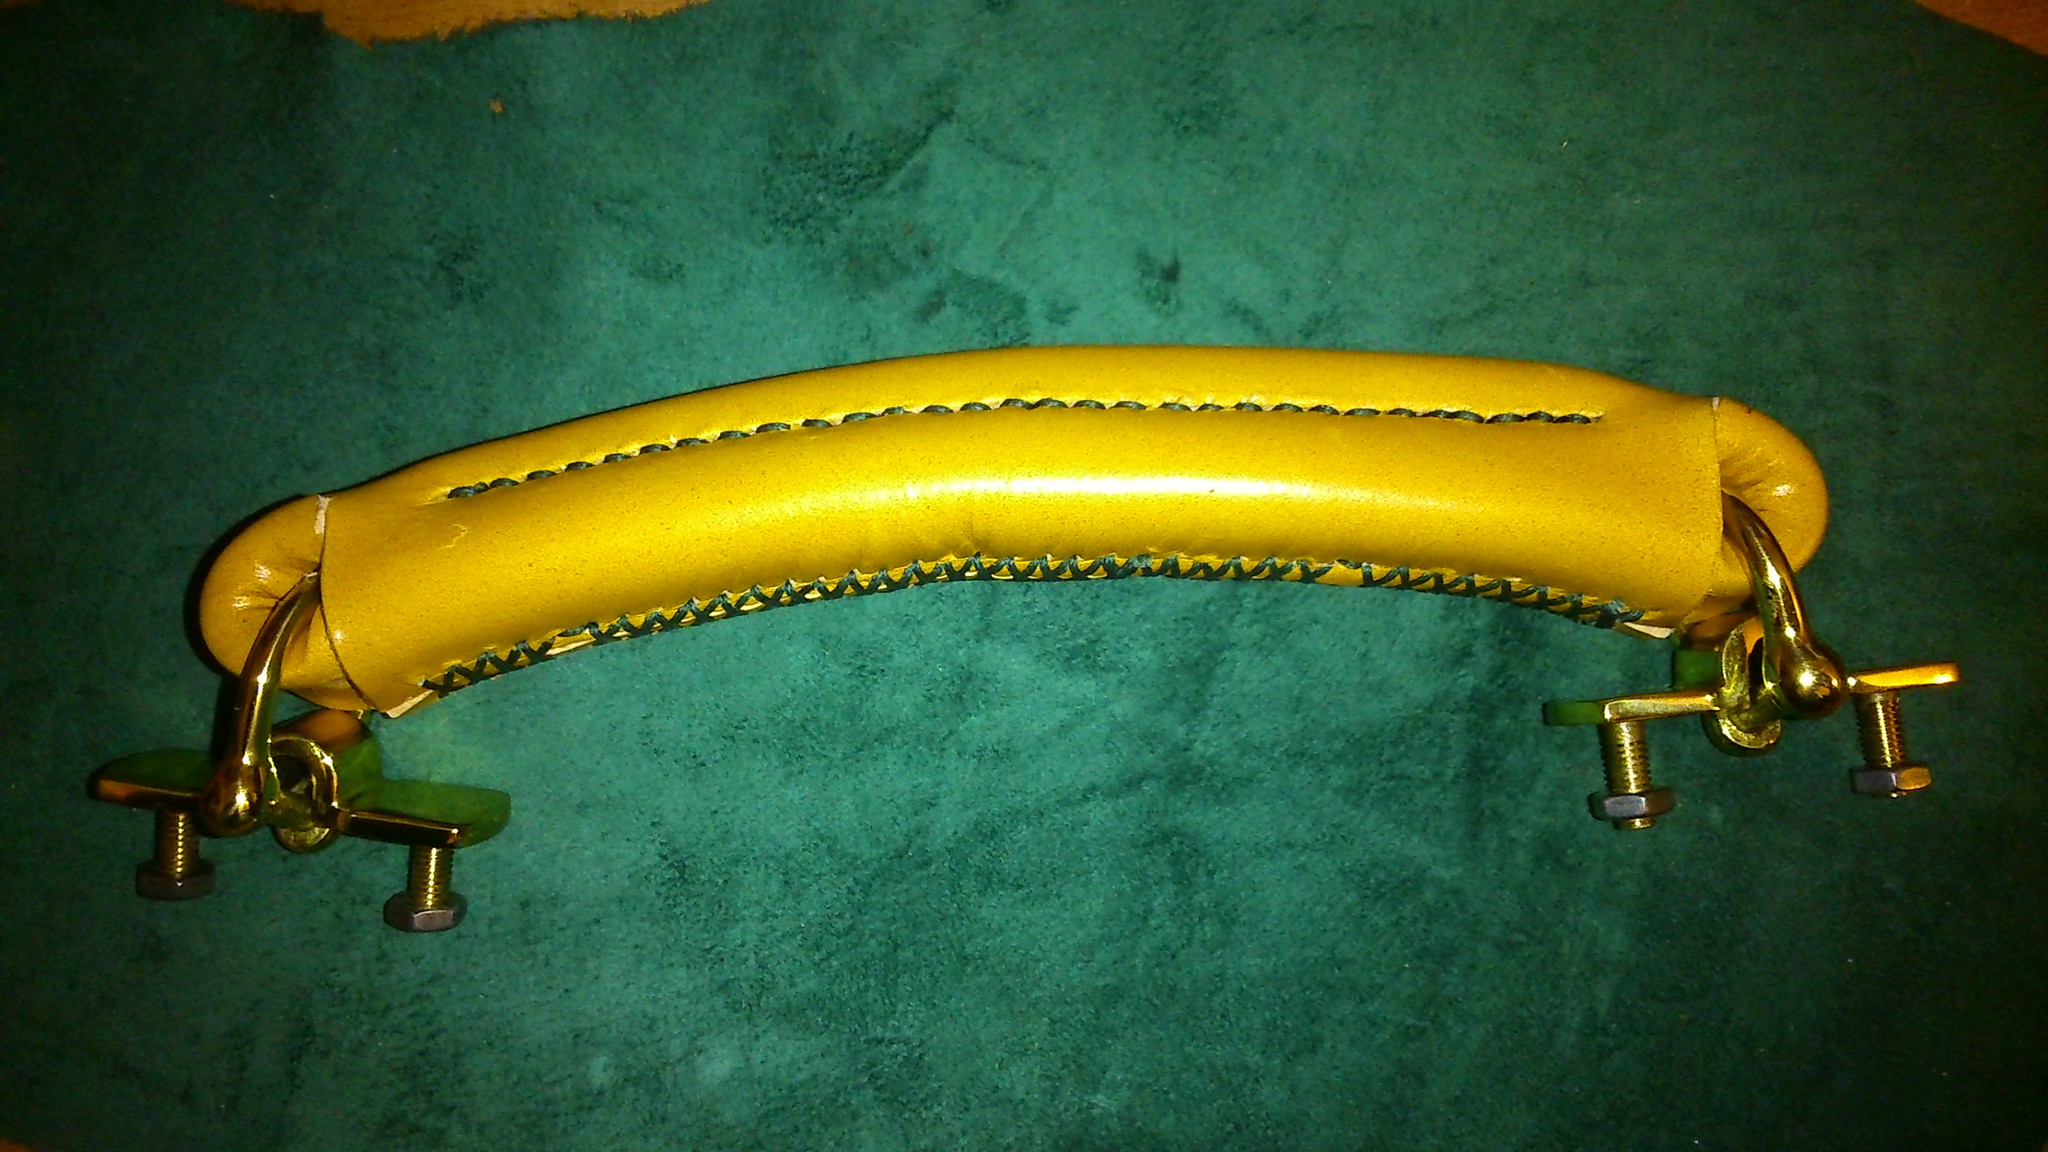
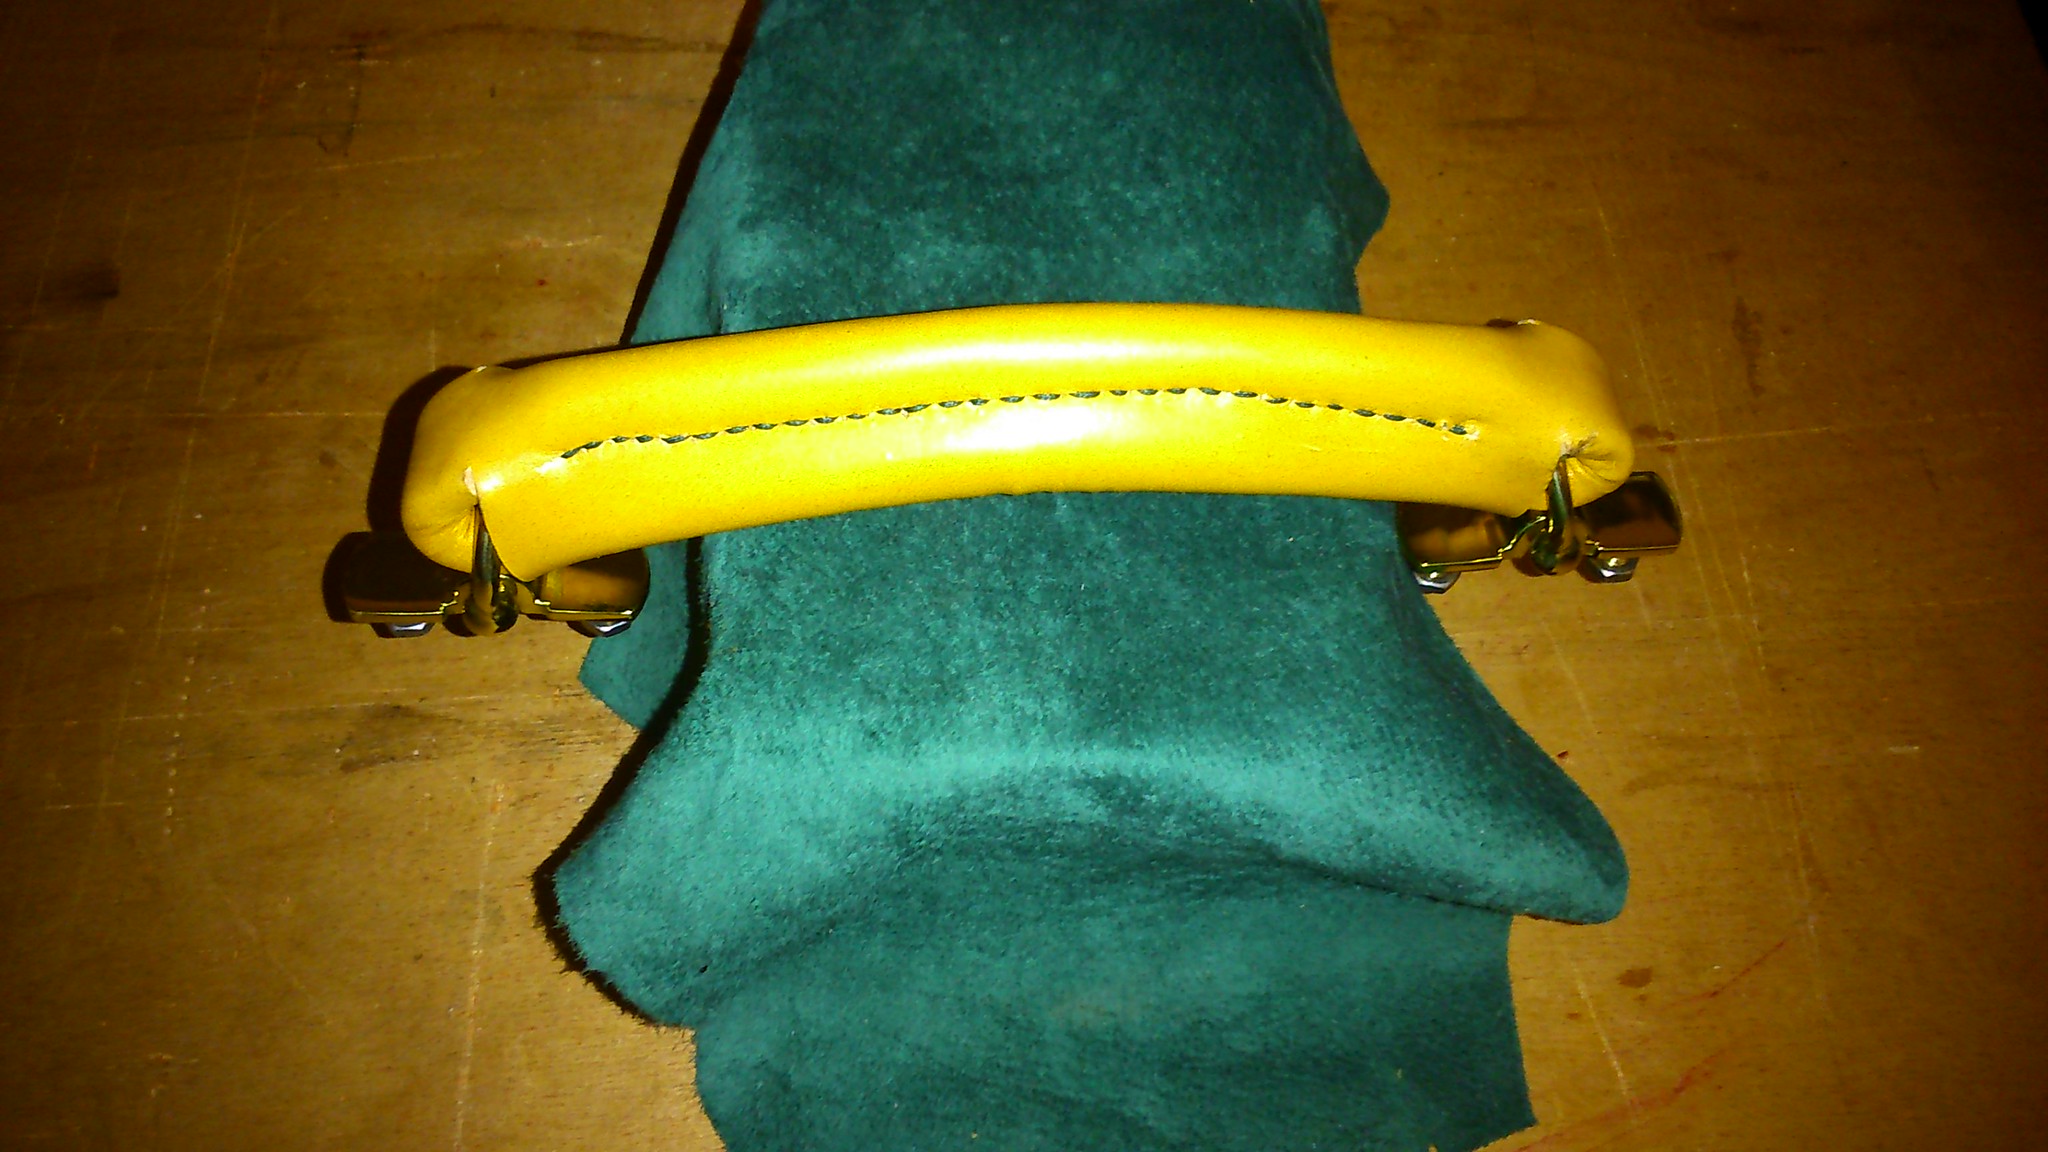
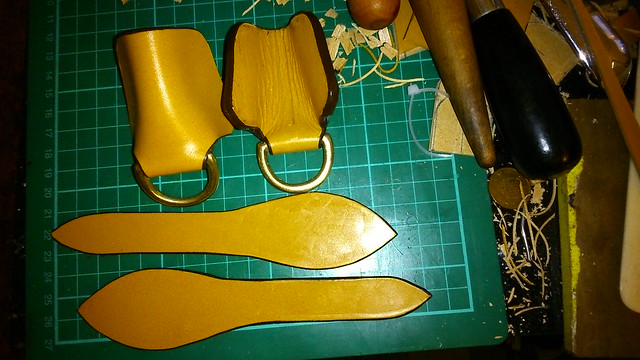
    I have started to sew the handle together I like the idea if the green suede for the interior but I am having second thoughts about the green thread.

    For the moment I have stopped while I consider the options.

    DSC_0384[1] by my0771, on Flickr

  28. The Following 2 Users Say Thank You to MY63 For This Useful Post:

    Crazyorange (October 17th, 2015), Mr. Reader (June 16th, 2016)

  29. #255
    Senior Member
    Join Date
    May 2013
    Location
    UK
    Posts
    1,233
    Thanks
    793
    Thanked 2,008 Times in 819 Posts
    Rep Power
    13

    Default Re: Custom Bag

    I have decided to stick with the green for both thread and suede lining.
    Here is the finished handle it measures 95 mm around the grip which fits my hand perfectly and 175 mm between the centres of the handle rings.

    I have a stainless steel bar which is 20 mm x 3 mm I plan on drilling holes at 150 mm centres which will force the handle to curve slightly.
    Once I am happy with the position of the holes I will transfer them to the leather.

    DSC_0387[1] by my0771, on Flickr

    DSC_0386[1] by my0771, on Flickr

  30. The Following 3 Users Say Thank You to MY63 For This Useful Post:

    Crazyorange (October 17th, 2015), Mr. Reader (June 16th, 2016), mrcharlie (October 19th, 2015)

  31. #256
    Senior Member
    Join Date
    May 2013
    Location
    UK
    Posts
    1,233
    Thanks
    793
    Thanked 2,008 Times in 819 Posts
    Rep Power
    13

    Default Re: Custom Bag

    Today I have focused on my briefcase project The first job was to mark out and cut the back panel with front flap along with the inner divider and the front piece

    DSC_0399[1] by my0771, on Flickr

    The next step was to mark out where I wanted the gusset piece to bend

    DSC_0393[1] by my0771, on Flickr

    After marking out all of the bends I used a grooving tool too....... well make groves along those lines this also allowed the water to soak into the leather and help the leather to bend.

    DSC_0397[1] by my0771, on Flickr

    Even after grooving and soaking the leather did not bend easily as I wanted neat folds rather than sewn joints I persevered and made it work.

    DSC_0404[1] by my0771, on Flickr

    There is more detail on my blog

    Thanks for looking

    Michael

  32. The Following 3 Users Say Thank You to MY63 For This Useful Post:

    Crazyorange (October 19th, 2015), Mr. Reader (June 16th, 2016), mrcharlie (October 19th, 2015)

  33. #257
    Senior Member fountainpagan's Avatar
    Join Date
    Jun 2015
    Location
    france
    Posts
    575
    Thanks
    887
    Thanked 565 Times in 270 Posts
    Rep Power
    9

    Default Re: Custom Bag

    Beautiful job, Michael.

  34. The Following User Says Thank You to fountainpagan For This Useful Post:

    MY63 (October 20th, 2015)

  35. #258
    Senior Member
    Join Date
    May 2013
    Location
    UK
    Posts
    1,233
    Thanks
    793
    Thanked 2,008 Times in 819 Posts
    Rep Power
    13

    Default Re: Custom Bag

    I had hoped to share the lining today however I did not have enough suede so I will save that for another day.

    I decided to make the straps and buckle mounts along with the anchor points for the shoulder strap which I planned to fix over the divider.

    DSC_0412[1] by my0771, on Flickr

    I did make a mistake with the marking out but my measure twice mantra made sure I caught that although I had made it too big so I could have rescued it later.

    DSC_0413[1] by my0771, on Flickr

    The finished pieces

    DSC_0418[1] by my0771, on Flickr

    Thanks for looking

    Michael

  36. The Following 3 Users Say Thank You to MY63 For This Useful Post:

    Crazyorange (October 21st, 2015), Mr. Reader (June 16th, 2016), mrcharlie (October 21st, 2015)

  37. #259
    Senior Member
    Join Date
    May 2013
    Location
    UK
    Posts
    1,233
    Thanks
    793
    Thanked 2,008 Times in 819 Posts
    Rep Power
    13

    Default Re: Custom Bag

    I finished making the buckle mounts last night

    DSC_0422[1] by my0771, on Flickr

    Today I started marking out the front panel for the lock and buckle mounts

    DSC_0423[1] by my0771, on Flickr

    I made the holes for the lock using its backing plate as a template. The buckle mounts have a front and a tail piece which is fed through a slot it is then riveted and sewn in place for added strength.

    DSC_0431[1] by my0771, on Flickr

    DSC_0433[1] by my0771, on Flickr

    The suede for the interior arrived this afternoon.

  38. The Following 3 Users Say Thank You to MY63 For This Useful Post:

    Crazyorange (October 23rd, 2015), Mr. Reader (June 16th, 2016), mrcharlie (October 24th, 2015)

  39. #260
    Senior Member
    Join Date
    May 2013
    Location
    UK
    Posts
    1,233
    Thanks
    793
    Thanked 2,008 Times in 819 Posts
    Rep Power
    13

    Default Re: Custom Bag

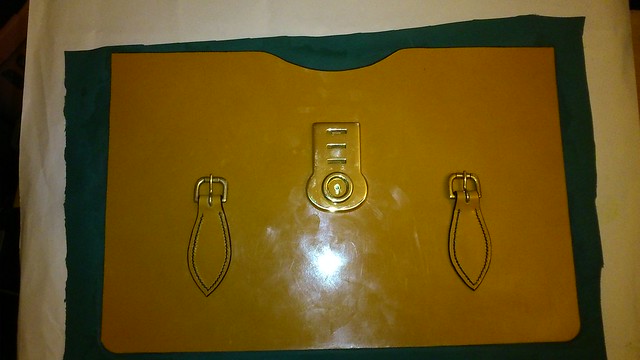
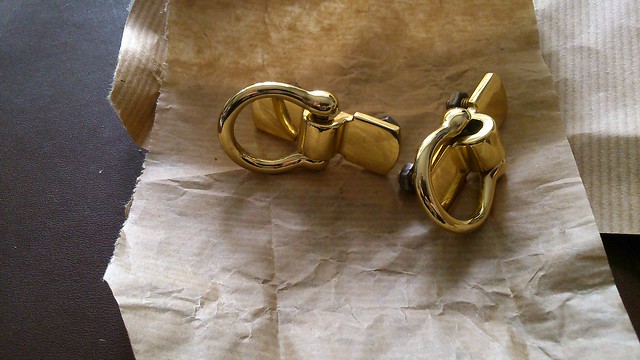
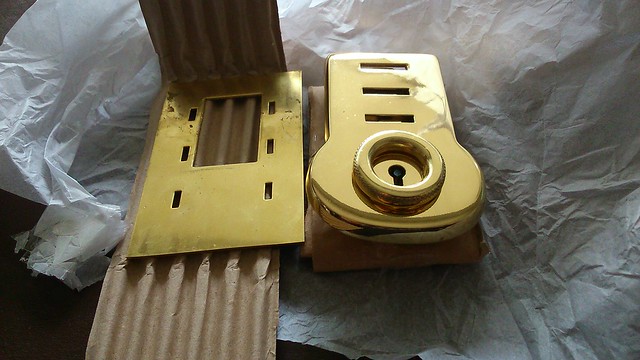
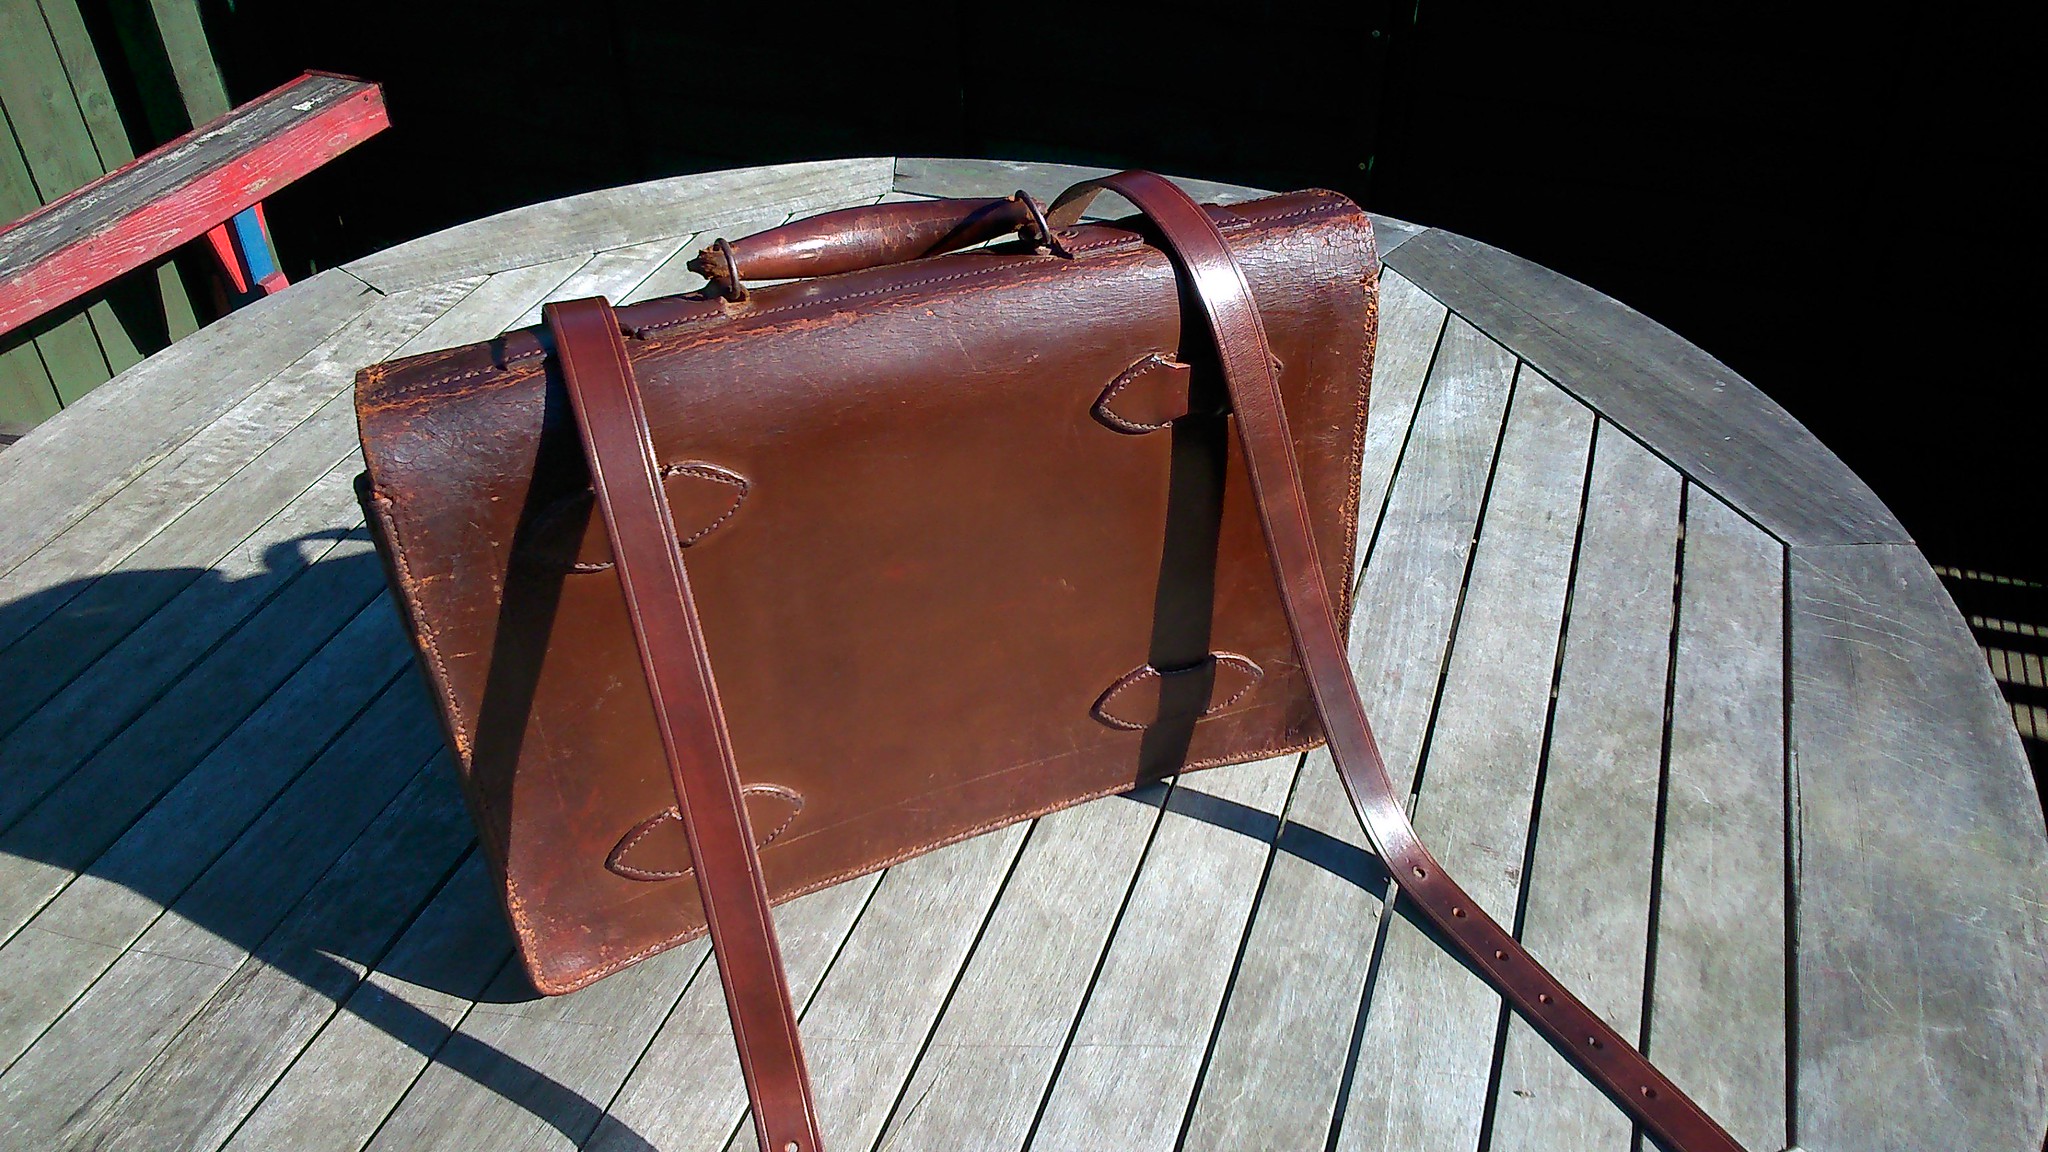
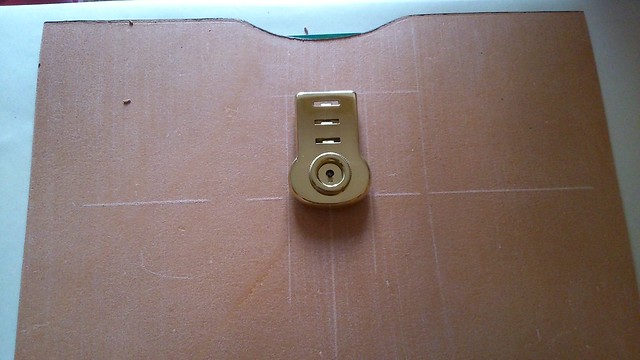
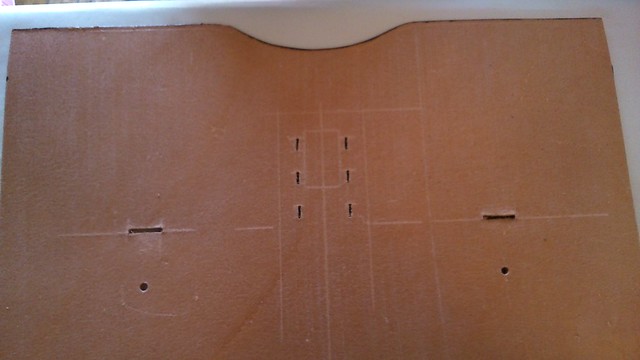
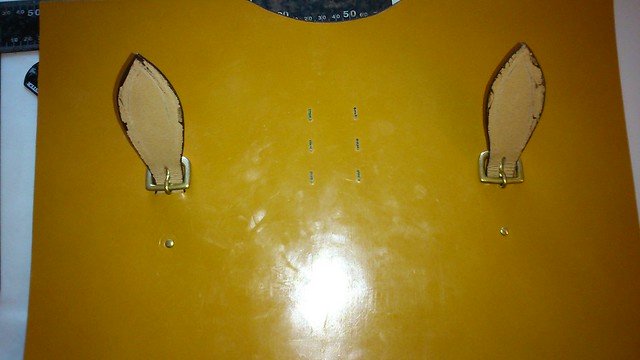
    Today I fitted the suede to the inside of some of the pieces the back panel needs the handle fitted before I can go any further. The piece of metal I have is a little wider that I would like at 20 mm my ideal would have been 15 mm I splashed out and bought stainless steel so cutting 5 mm off with a hacksaw is not an option either as it is very hard.

    Todays other problem is I have fitted the lock lower than I had intended. I got it in my head that I wanted the centre of the lock in line with the centre of the buckles not thinking that the flap might not be long enough. Too late now. There is no spare leather so I cannot remake the front panel I have tried the back and front together and it looks ok so fingers crossed

    DSC_0442[1] by my0771, on Flickr

  40. The Following 3 Users Say Thank You to MY63 For This Useful Post:

    Crazyorange (October 24th, 2015), Mr. Reader (June 16th, 2016), mrcharlie (October 24th, 2015)

Bookmarks

Posting Permissions

  • You may not post new threads
  • You may not post replies
  • You may not post attachments
  • You may not edit your posts
  •