


Rotring. The making of a Frankenkuli.
Recently I posted an article about Rotring Tintenkuli stylographic pens.
http://fpgeeks.com/forum/showthread....nd-maintenance
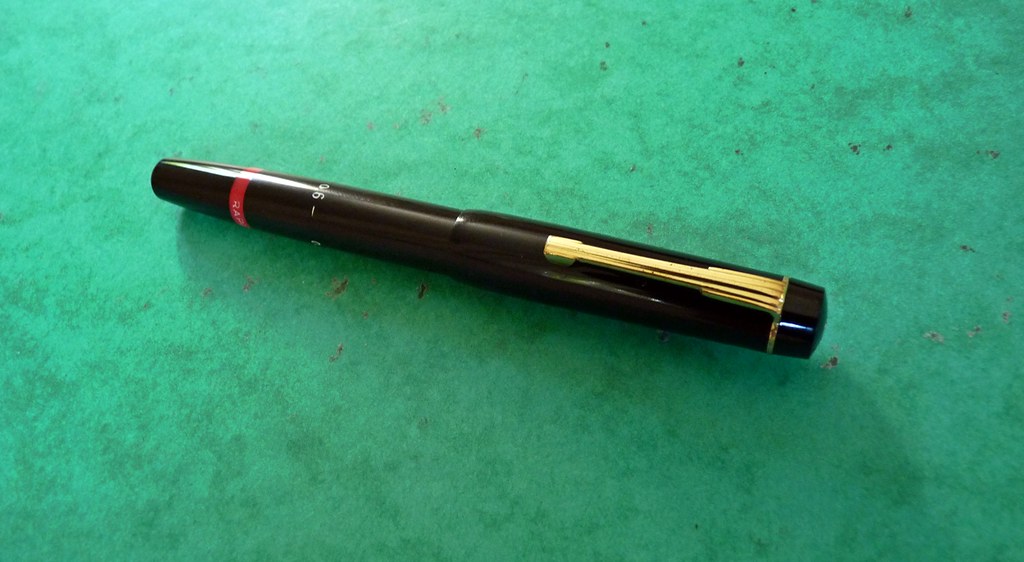
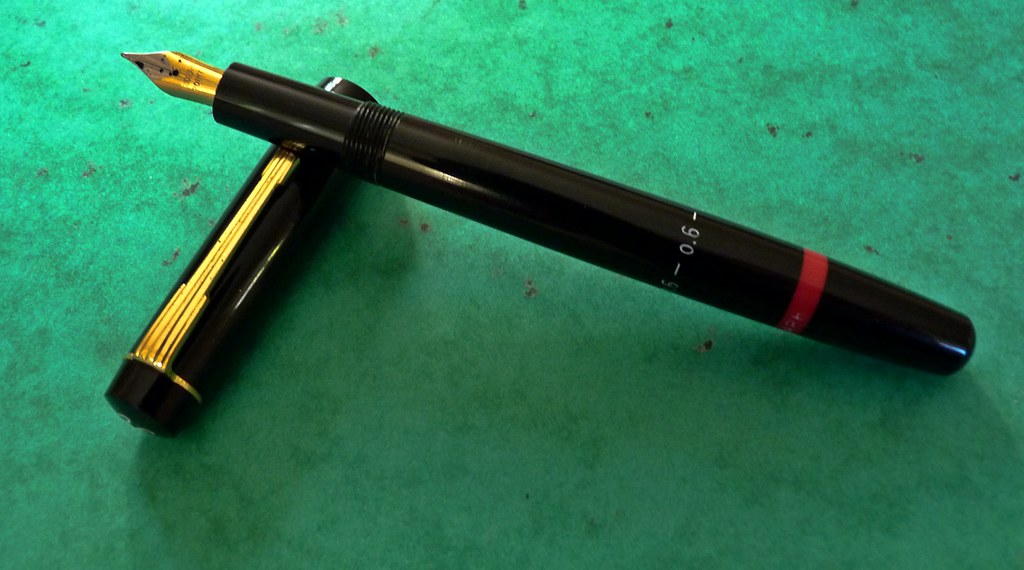
In one picture I showed some of the stylographs in my collection and one of these was a Rotring Tintenkuli that I converted into a calligraphic pen. Here is another picture of it.
One member replied in that post with a question:
Because I had some Tintenkuli pens that needed repair I decided it was nice to make a separate posting about the project of converting a defective Kuli into a regular fountain pen. The only extra parts I needed for this project were a 4,5mm feeder and a nib, wide or small enough to fit. Of course I also could have used another calligraphic nib, like the one showed above, or a nice vintage golden flex nib, but as I had this nice new old stock Reform nib, that seemed to have the right measure, I decided to use this one. The technique is basicly the same. In some cases a complete nib unit with a fitting tread, such as the Esterbrook nibs or the calligraphic nib units by Osmiroid make the conversion of course somewhat more simple as you do not have to convert the original Rotring nib unit into a sleeve for the new nib/feeder combination.Originally Posted by amk

Once the nib unit of a Rotring like this has been damaged beyond the possibility of repair, youll end up with a nice but useless pen body, with an excellent piston filling system. There are 2 possibilities to get it working again: find another stylographic nib (donor pen) or convert the body to an normal fountain pen.
This project starts with a Rotring Tintenkuli pen that had three different problems in one pen, so it makes an ideal demonstration object.
When I found it at a flea market it looked OK at first sight. But it is definitely not OK. Look at the damaged section!
As it is not possible to separate the section of a Rotring Tintenkuli from the barrel, this damage is non repairable, unless . Read further.
2nd problem. A defective nib unit. The needle is gone, probably a part of it is stuck in the steel tube. When a spare nib unit is available and the rest of the pen would have been ok, the problem would be easily solved by exchanging the nib unit. In this case there is no spare nib available and the section of the pen is damaged, so Im going for another solution.
3rd problem: a shrunken and thus leaking cork seal in the piston filling system. Possible solution: A new seal. Ill come back to that later.
Question: How can this pen be saved to be a functional writer again?
Answer: Convert it to a standard fountain pen with a nib and feeder and repair the seal.
So here we go.
Part one the nib modification.
At first, the defective nib unit is going to be used as a sleeve for a nib/feeder combination. For this project I found a nice new old stock Reform M nib, that looked like having the right measurements.
In order to find a ink feeder that will fit I first have to measure the inside diameter of the nib unit with a calliper.
As it measures 4.61 mm I will need a feeder of about 4.5mm. In combination with the nib it must fit with enough friction to hold the nib.
Bingo! (When it fits in the rear, it wil fit in the front).
Now the front part of the tintenkuli nib unit has to be cut off. To get a nice 90 degree cut I use a lathe and a single steel saw blade.
The cut has been made. Notice the brownish debris on the blade: ebonite!
The modified Tintenkuli tube, the feeder and the nib fit well together.
Next thing to do is the modification of the pens section. The section has to be shortened because the new nib is longer than the original stylograph nib. If the section is not made shorter, the cap will not fit. In this case: this is exactly what I want. I had to remove the damaged part of the section anyway!
The pen body is mounted in the lathe and with the saw blade the damaged part of the section is cut away. Look the brown dust. Ebonite again.
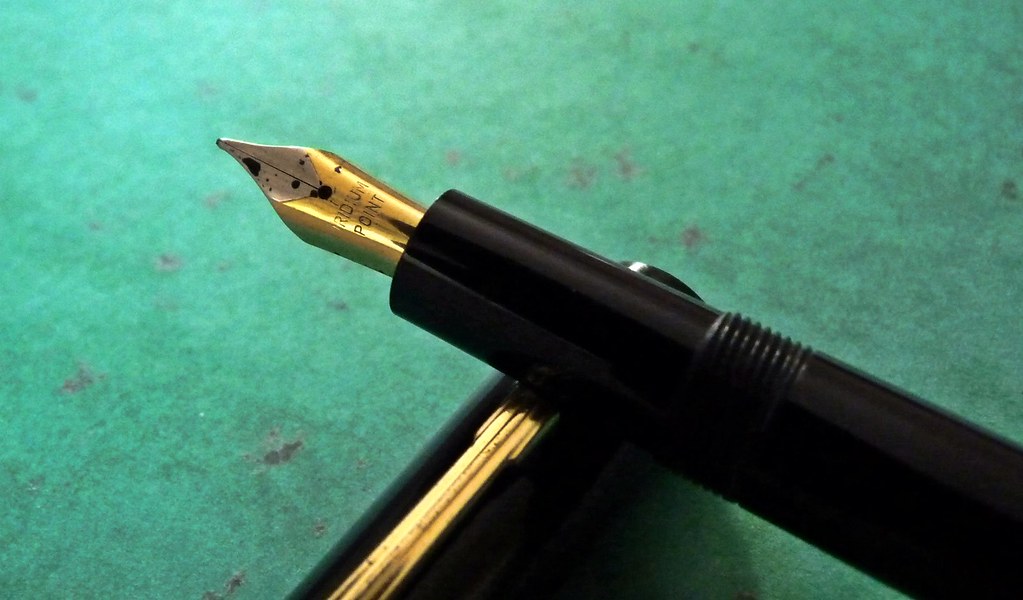
After cutting and polishing the nib unit is screwed in the shortened section.
The nib unit can be screwed in, but it is still too long for the (remaining ) part of the section.
So I have to shorten the nib unit sleeve too.
The shortened sleeve, the feeder and the nib can be mounted together.
Now it fits. When there would not be a problem with the cork seal, the modification of this pen would now be practically ready. But I also need a new seal in the filling system to replace the defective (shrunken) cork.
As the FPG System Management does not allow me to have more that 15 illustration inserts (e.g. foto's) in one posting I have to stop my story here. But it will be continued.
I made a part 2 where the repair of the seal and the final finishing of the pen is shown.
So, thank you for reading so far and see you in part 2!
Lex
To read further, click here for part 2: http://fpgeeks.com/forum/showthread....184#post182184


 Reply With Quote

Bookmarks