Page 7 of 17 FirstFirst ... 56789 ... LastLast
Results 121 to 140 of 335

Thread: Custom Bag

  1. #121
    Senior Member
    Join Date
    May 2013
    Location
    UK
    Posts
    1,233
    Thanks
    793
    Thanked 2,008 Times in 819 Posts
    Rep Power
    12

    Default Re: Custom Bag

    Hi Elaineb

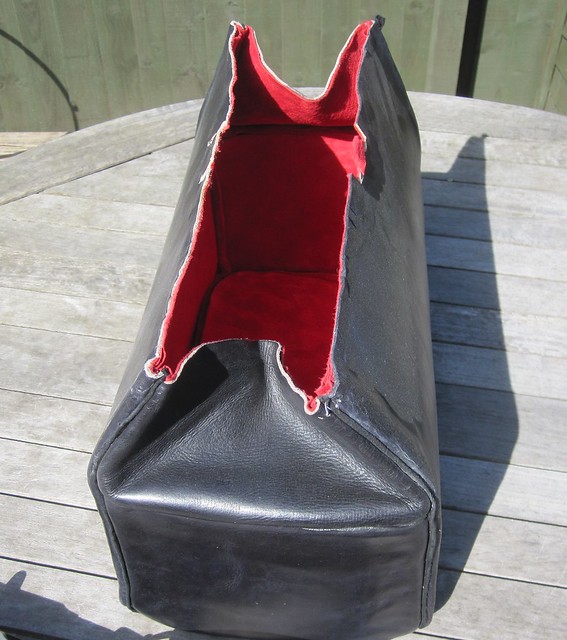
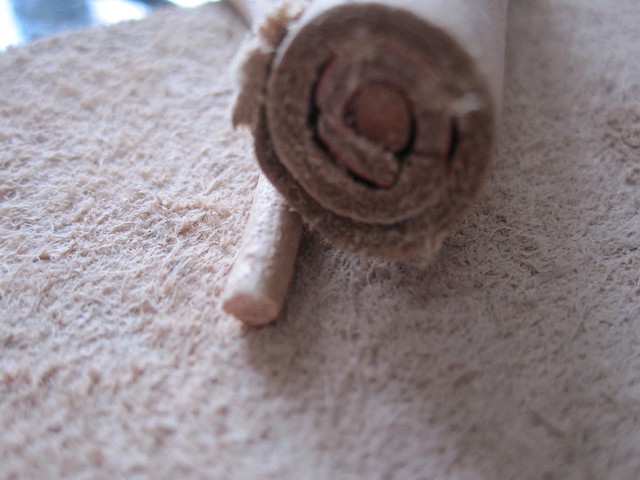
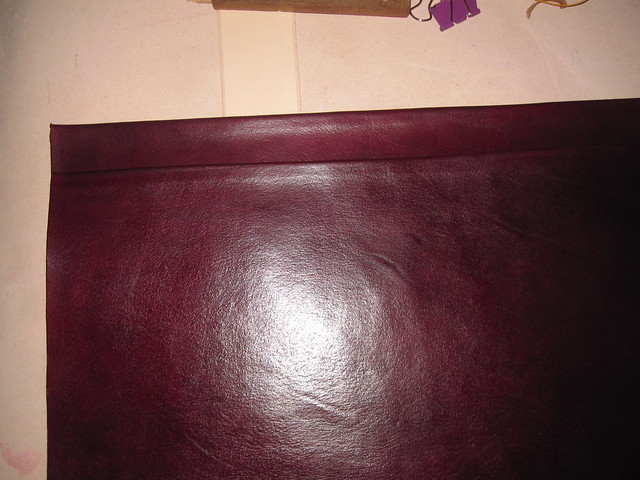
    Once the veg tanned leather is soaked the hard leather becomes very soft and it is very easy to turn the right way around, it will not tear but it will pick up marks from finger nails or any thing else so you have to be careful.
    You need to keep it in the shape you require as it dries because once dry it will be fixed in that shape
    The bag is not fully dry yet so I am leaving it to dry fully before I decide which areas have not turned out well, I can re wet those areas to get them the way I want them.

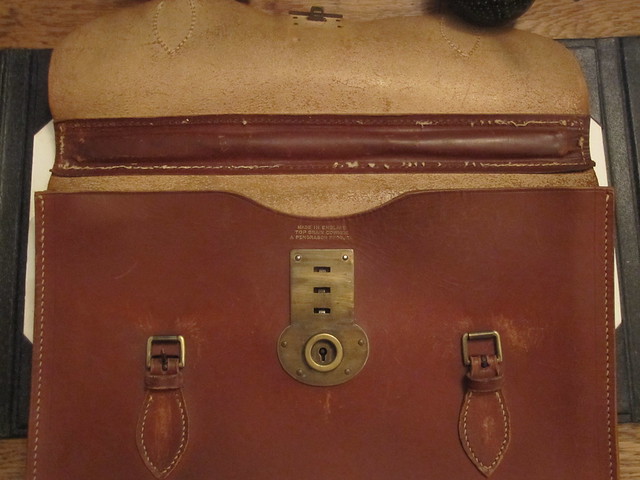
    This is a very simple lock it has a single plate (lever) that moves up and down it is called a single lever lock more complicated locks have more levers 5 is the number of levers in a high security lock in the UK,
    Fitted in the lever is a small spring which is essential it is on the right in this picture the lock is open

    IMG_9787_1 by my0771, on Flickr

    In the second picture you can see the key and the lever is in the locked position

    IMG_9788_1 by my0771, on Flickr

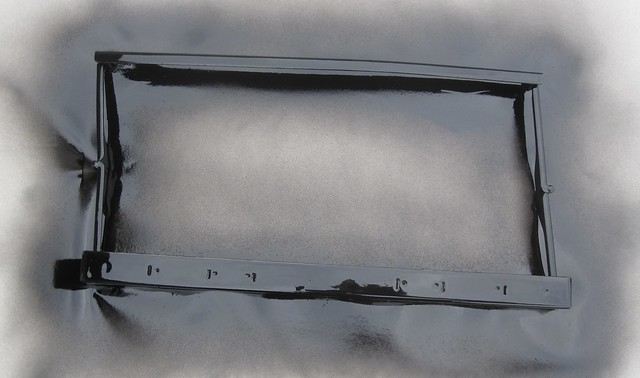
    In the third picture you can see the whole lock together but inside out so you can see how it works the two silver pins are moved in and out when the two buttons are squeezed on the other side when in the locked position the lever stops any movement.

    IMG_9790_1 by my0771, on Flickr

    Here is a picture in the locked position

    IMG_9789_1 by my0771, on Flickr

    Thanks for looking

    Michael
    Last edited by MY63; March 20th, 2015 at 04:27 PM.

  2. #122
    Senior Member
    Join Date
    May 2013
    Location
    UK
    Posts
    1,233
    Thanks
    793
    Thanked 2,008 Times in 819 Posts
    Rep Power
    12

    Default Re: Custom Bag

    I have learned another important lesson this week, I made templates for the cardboard pieces that line the inside of the bag which are then wrapped in suede and glued in place.
    So what I have learned is that does not work the dimensions of the bag have changed and my templates were no good so I had to start again

    IMG_9804_1 by my0771, on Flickr

    As you can see from the picture I have re made all of the pieces and they are ready to be wrapped in suede.
    I managed to track down some rivets for the metal work which I am rubbing down ready to re paint it, I was unhappy with the finish of the brush on enamel paint so will be getting some spray on paint tomorrow.

  3. #123
    Senior Member
    Join Date
    May 2013
    Location
    UK
    Posts
    1,233
    Thanks
    793
    Thanked 2,008 Times in 819 Posts
    Rep Power
    12

    Default Re: Custom Bag

    last night and this morning I spent some time preparing the metal work for this bag for spraying

    IMG_9807_1 by my0771, on Flickr

    IMG_9810_1 by my0771, on Flickr

    The paint is still wet these pictures were taken a few minutes after the second coat was applied I intend to apply another two coats weather permitting !

    Thanks for looking

    Michael

  4. The Following User Says Thank You to MY63 For This Useful Post:

    Crazyorange (March 27th, 2015)

  5. #124
    Senior Member
    Join Date
    May 2013
    Location
    UK
    Posts
    1,233
    Thanks
    793
    Thanked 2,008 Times in 819 Posts
    Rep Power
    12

    Default Re: Custom Bag

    I have fitted the side and end panels into the bag now and it holds its shape really well

    IMG_9815_1 by my0771, on Flickr

    Unfortunately the metal work I sprayed yesterday is still a little tacky and I noticed a run in the paint this morning so I will need to do a little more work on that.

    Regular readers will remember I have been searching for replacement rivets and have found a supplier in the UK who had just what I needed

    IMG_9830_1 by my0771, on Flickr

    They are a very good fit and the colour is a good match too. I have not cleaned or polished the other metal work that holds the bag together as I still feel bad about renewing the leather.

    IMG_9824_1 by my0771, on Flickr

    Thanks for looking

    Michael

  6. The Following 2 Users Say Thank You to MY63 For This Useful Post:

    Crazyorange (March 28th, 2015), elaineb (March 28th, 2015)

  7. #125
    Senior Member
    Join Date
    May 2013
    Location
    UK
    Posts
    1,233
    Thanks
    793
    Thanked 2,008 Times in 819 Posts
    Rep Power
    12

    Default Re: Custom Bag

    After many attempts at painting the metal work for this bag I have finally achieved a finish that I am happy with

    IMG_9870_1 by my0771, on Flickr

    As with many projects this is a learning process I have sewed the edges right to the top however when I dry fitted everything I found that I need to remove some of the seams to allow the metalwork to fit in place, so a little more cutting and sewing is required.

  8. The Following User Says Thank You to MY63 For This Useful Post:

    Crazyorange (March 31st, 2015)

  9. #126
    Senior Member
    Join Date
    May 2013
    Location
    UK
    Posts
    1,233
    Thanks
    793
    Thanked 2,008 Times in 819 Posts
    Rep Power
    12

    Default Re: Custom Bag

    Today I riveted the handle and end pieces in place ready for the final assembly which I am planning to do tomorrow.

    IMG_9876_1 by my0771, on Flickr

    I may give the handle a quick rub over with some black dye to tidy it up a little.

    Thanks for looking

    Michael

  10. #127
    Senior Member
    Join Date
    May 2013
    Location
    UK
    Posts
    1,233
    Thanks
    793
    Thanked 2,008 Times in 819 Posts
    Rep Power
    12

    Default Re: Custom Bag

    I have forgotten to rivet the feet into place so that will be my next job before I put the two pieces together this is the finished metal work

    IMG_9899_1 by my0771, on Flickr

    The bag itself needs to have all four corners trimmed and the feet riveted in place and it also needs a polish with some nice wax

    IMG_9902_1 by my0771, on Flickr

    Thanks for looking

    Michael

  11. The Following User Says Thank You to MY63 For This Useful Post:

    Crazyorange (April 6th, 2015)

  12. #128
    Senior Member
    Join Date
    May 2013
    Location
    UK
    Posts
    1,233
    Thanks
    793
    Thanked 2,008 Times in 819 Posts
    Rep Power
    12

    Default Re: Custom Bag

    As one project nears completion which I am planning on keeping for myself although I have said that before
    I have two other cases that are in the early stages

    This is the first based on the hardware from an old Gladstone type case the pieces are all marked out and cut out oversize ready to be dyed

    IMG_9888_1 by my0771, on Flickr

    The second is a full custom small messenger bag here you can see the pieces all marked out ready for cutting out

    IMG_9882_1 by my0771, on Flickr

    And if I finish them

    IMG_9928_1 by my0771, on Flickr

    IMG_9937_1 by my0771, on Flickr

    I have managed to acquire another Pendragon brief case this time a tan one which I will re sew and line in suede, The owner of the first case is very happy with the addition of the strap that I will be adding one to this case also.

    Thanks for looking

    Michael

  13. #129
    Senior Member
    Join Date
    May 2013
    Location
    UK
    Posts
    1,233
    Thanks
    793
    Thanked 2,008 Times in 819 Posts
    Rep Power
    12

    Default Re: Custom Bag

    OK to update from yesterdays post time to add a little colour the first 5 pieces now look like this

    IMG_9944_1 by my0771, on Flickr

    The second case is burgundy and is bigger

    IMG_9945_1 by my0771, on Flickr

    the next picture shows the front inside divider and the back pocket

    IMG_9946_1 by my0771, on Flickr

    Finally the gusset piece buckles and handle

    IMG_9940_1 by my0771, on Flickr

    All of the components will be left to dry overnight and fingers crossed I will be happy with the colour tomorrow

    Thanks for looking

    Michael

  14. #130
    Senior Member
    Join Date
    May 2013
    Location
    UK
    Posts
    1,233
    Thanks
    793
    Thanked 2,008 Times in 819 Posts
    Rep Power
    12

    Default Re: Custom Bag

    Dying leather is not easy getting an even colour is almost impossible getting something you are happy with is a compromise which I often find difficult.
    I start the process with a 50 50 mix of dye and dye reducer so after two days of applying coat after coat this is what I have

    IMG_9954_1 by my0771, on Flickr

    It is a rich and deep colour for some reason it looks more patchy in the pictures than it does in person.

    The next stage is to think about the handle one of the requests for this project was for a handle that was attached directly to the bag with as little flex as possible you can buy handle kits but there is no fun in that.
    So this is how I am going to start a 3mm diameter leather thong and a piece of leather

    IMG_9961_1 by my0771, on Flickr

    Roll the thong in the leather and add a little glue

    IMG_9964_1 by my0771, on Flickr

    The diameter changes to 12 mm this is the core of the handle I will add layers of leather to form the final shape

    Thanks for looking

    Michael

  15. The Following User Says Thank You to MY63 For This Useful Post:

    Crazyorange (April 11th, 2015)

  16. #131
    Senior Member
    Join Date
    May 2013
    Location
    UK
    Posts
    1,233
    Thanks
    793
    Thanked 2,008 Times in 819 Posts
    Rep Power
    12

    Default Re: Custom Bag

    I have started the assembly process on the burgundy bag commissioned by a member on fpn, I started this morning by backing the dyed leather in the cognac suede chosen for this project.

    The gusset piece had been soaked in water before the suede was glued in place I folded the gusset in half and pressed it down.


    IMG_9970_1 by my0771, on Flickr


    The next two pictures show both sides of the centre divider one is leather the other is suede


    IMG_9972_1 by my0771, on Flickr


    IMG_9974_1 by my0771, on Flickr


    The reason for starting with the centre is when I restored the pendragon case earlier in this thread I found it very difficult to add the centre section.


    Thanks for looking


    Michael

  17. The Following User Says Thank You to MY63 For This Useful Post:

    Crazyorange (April 13th, 2015)

  18. #132
    Senior Member Lady Onogaro's Avatar
    Join Date
    Jan 2014
    Location
    Lafayette, LA
    Posts
    2,197
    Thanks
    5,214
    Thanked 1,579 Times in 943 Posts
    Rep Power
    13

    Default Re: Custom Bag

    This is so cool, Michael. I love seeing the steps along the way. Thanks so much for sharing.
    Lady Onogaro

    "Be yourself--everybody else is already taken." --Oscar Wilde

  19. The Following User Says Thank You to Lady Onogaro For This Useful Post:

    MY63 (April 12th, 2015)

  20. #133
    Senior Member
    Join Date
    May 2013
    Location
    UK
    Posts
    1,233
    Thanks
    793
    Thanked 2,008 Times in 819 Posts
    Rep Power
    12

    Default Re: Custom Bag

    Quote Originally Posted by Lady Onogaro View Post
    This is so cool, Michael. I love seeing the steps along the way. Thanks so much for sharing.
    Sometimes hitting the thanks button is just not enough I do appreciate your comments it means a lot to me to know my work is enjoyed by others.

    This picture shows the front piece and the rear pocket I had thought of running a line of stitching around the top edge of these panels as well as the centre divider there is also a technique to add a crease along the inside of the edge to add some detail however I am unsure what to add or if I should leave it alone

    IMG_9976_1 by my0771, on Flickr

    If anyone is wondering what happened to the blue panels I showed the other day well I am still adding dye as the colour was not quite right

    Thanks for looking

    Michael

  21. #134
    Senior Member
    Join Date
    May 2013
    Location
    UK
    Posts
    1,233
    Thanks
    793
    Thanked 2,008 Times in 819 Posts
    Rep Power
    12

    Default Re: Custom Bag

    I went to my suppliers this morning and asked the master saddler and he said "leave it alone it is fine" so that is what I will do.

    I need to finish the handle so I have glued a strip of leather to my tube and built up the ends there are no handles like this in my books so I am learning as I go the request was for a fixed handle without joints.

    IMG_9979_1 by my0771, on Flickr

    As you can see I have a long strip which will be fixed to the bag and I will wrap the round section and the strip in the same leather as the rest of the bag I plan on using the off cut from the flap on the front of the bag which I made extra long, (of course I did that on purpose)

    Thanks for looking

    Michael

  22. The Following User Says Thank You to MY63 For This Useful Post:

    Crazyorange (April 15th, 2015)

  23. #135
    Senior Member
    Join Date
    May 2013
    Location
    UK
    Posts
    1,233
    Thanks
    793
    Thanked 2,008 Times in 819 Posts
    Rep Power
    12

    Default Re: Custom Bag

    Look what I picked up today 9.5 sq ft of super soft pink nappa leather

    IMG_9985_1 by my0771, on Flickr

    Someone is going to be very happy

  24. The Following User Says Thank You to MY63 For This Useful Post:

    Crazyorange (April 15th, 2015)

  25. #136
    Senior Member Crazyorange's Avatar
    Join Date
    Feb 2014
    Posts
    1,729
    Thanks
    4,663
    Thanked 2,016 Times in 837 Posts
    Rep Power
    12

    Default Re: Custom Bag

    Happy dance!!!! Joy joy!!!!

  26. #137
    Senior Member
    Join Date
    May 2013
    Location
    UK
    Posts
    1,233
    Thanks
    793
    Thanked 2,008 Times in 819 Posts
    Rep Power
    12

    Default Re: Custom Bag

    The burgundy bag for want of a better name has caused me some issues over the last few weeks like many people I sometimes doubt my own ability and the flap and fastening straps caused me much doubt.
    In the end I realised that the straps were too large and this was throwing all of my measurements out once I realised this was the issue I was able to cut the straps down to size and fit them this morning after cutting the flap to the correct length.
    I will explain more about straps and their fitting later for now though.

    IMG_0048_1 by my0771, on FlickrEverything is held together by small clips at the moment except for the rear pocket which is glued in place ready for sewing

    Thanks for looking

    Michael
    Last edited by MY63; April 20th, 2015 at 12:16 PM.

  27. The Following 2 Users Say Thank You to MY63 For This Useful Post:

    Crazyorange (April 20th, 2015), reprieve (April 20th, 2015)

  28. #138
    Senior Member reprieve's Avatar
    Join Date
    Apr 2013
    Location
    just a little bird floating on a hurricane
    Posts
    958
    Thanks
    1,791
    Thanked 987 Times in 439 Posts
    Rep Power
    12

    Default Re: Custom Bag

    That burgundy bag is gorgeous! It's coming together really nicely. It looks like a sleeker, modern version of the vintage Pendragon cases. Very impressive.

  29. #139
    Senior Member
    Join Date
    May 2013
    Location
    UK
    Posts
    1,233
    Thanks
    793
    Thanked 2,008 Times in 819 Posts
    Rep Power
    12

    Default Re: Custom Bag

    Thanks Reprieve it is indeed in the Pendragon style the fastening straps were made from the template I took from your very own case, I have reduced them in size as the case is a little smaller.
    This is my first bag made entirely by me so I am very pleased with it.
    Last edited by MY63; April 21st, 2015 at 03:01 PM.

  30. #140
    Senior Member
    Join Date
    May 2013
    Location
    UK
    Posts
    1,233
    Thanks
    793
    Thanked 2,008 Times in 819 Posts
    Rep Power
    12

    Default Re: Custom Bag

    I cut the upper and lower straps from the same template the upper ones are just attached to the flap,

    IMG_0049_1 by my0771, on Flickr

    The lower straps need a stronger hold so a slot is cut for the pin then the strap is folded back under as you can see from the picture, to add more strength I have punched a hole for a rivet. according to the book I should cut a slot in the front of the case and pass the lower part of the strap through before riveting through the front of the case and the lower part of the strap.
    The upper part of the strap is the sewn into place this allows the upper part of the strap to lie almost flat while covering the head of the rivet.

    I hope this makes sense

    Michael

  31. The Following User Says Thank You to MY63 For This Useful Post:

    Crazyorange (April 21st, 2015)

Bookmarks

Posting Permissions

  • You may not post new threads
  • You may not post replies
  • You may not post attachments
  • You may not edit your posts
  •